Sourdough Brownies-Irresistible Chocolate-Tart Treat
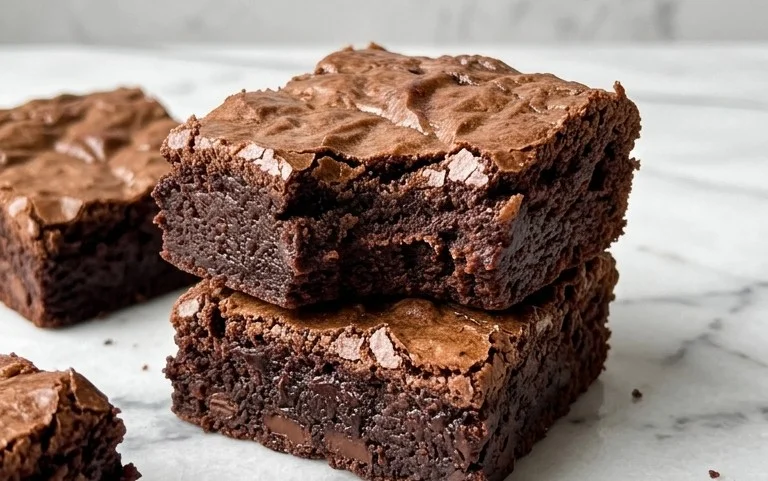
Sourdough brownies might sound a little unusual at first, but trust me, they are an absolute game-changer for anyone who loves a rich, fudgy treat. If you’re like me, you’ve probably dabbled in sourdough baking, perhaps with a starter bubbling away on your counter. What if I told you that you could use that magic starter to elevate your brownie game to an entirely new level? People adore brownies for their intensely chocolatey flavor and satisfyingly dense texture, but these sourdough brownies offer something more. The subtle tang from the sourdough starter doesn’t just add a unique twist; it actually deepens the chocolate flavor and creates an unbelievably tender crum extractb. It’s a complex, sophisticated sweetness that you won’t find in your average brownie. Get ready to discover your new favorite chocolate indulgence.
Sourdough Brownies Recipe
There’s something undeniably magical about brownies. That perfect balance of rich chocolatey goodness, a slightly chewy edge, and a fudgy, decadent center. But what if I told you we could elevate this classic dessert to a whole new level of deliciousness using our trusty sourdough starter discard? That’s right, incorporating sourdough discard into brownies adds a subtle tang that brilliantly cuts through the sweetness, while also contributing to an incredible, moist, and tender crum extractb. It’s a game-changer, and I can’t wait for you to try it. This recipe is designed to be approachable, even if you’re new to baking with sourdough discard.
Ingredients:
Cooking Instructions:
Step 1: Melting the Chocolate Base
The foundation of any great brownie lies in its chocolate. We’ll start by melting our butter and semi-sweet chocolate chips together. You can do this in a heatproof bowl set over a saucepan of simmering water (a double boiler method), ensuring the bottom of the bowl doesn’t touch the water. Alternatively, you can microwave the butter and chocolate chips in 30-second intervals, stirring well after each interval, until fully melted and smooth. This gentle melting process prevents the chocolate from scorching. Once melted, remove the bowl from the heat and stir in the dutched cocoa powder. Whisk until it’s completely incorporated and there are no dry pockets of cocoa. This step is crucial for ensuring a uniformly rich chocolate flavor throughout your brownies. Let this mixture cool slightly for about 5-10 minutes.
Step 2: Creating the Rich Chocolate Batter
In a separate medium bowl, whisk together the 2 large eggs and 1 egg yolk. This extra yolk is our secret weapon for extra fudgin extractess! Add in both the granulated sugar and the dark brown sugar to the eggs. Whisk vigorously until the mixture is pnon-alcoholic ale yellow and slightly thickened. This process, called “creaming,” incorporates air into the batter, contributing to the brownie’s texture. Next, pour in the vanilla extract and our star ingredient: the sourdough starter discard. Whisk everything together until it’s well combined. Don’t worry if the mixture looks a little soupy at this stage; that’s perfectly normal. Now, it’s time to gently fold the slightly cooled chocolate mixture into the egg and sugar mixture. Use a spatula and fold until just combined. Overmixing at this stage can lead to tougher brownies, so be gentle.
Step 3: Incorporating the Dry Ingredients
In another small bowl, whisk together the all-purpose flour and the salt. The salt is important not just for flavor, but also to balance the sweetness and enhance the chocolate notes. Now, add these dry ingredients to the wet chocolate batter. Fold them in with your spatula until just combined. Again, resist the urge to overmix. A few streaks of flour remaining are okay, as they will disappear during baking. The batter will be thick and glossy at this point. This is exactly what we want for a fudgy brownie.
Step 4: Preparing for Baking and Adding Inclusions (Optional)
Preheat your oven to 350 degrees Fahrenheit (175 degrees Celsius). Line an 8×8 inch baking pan with parchment paper, leaving some overhang on the sides. This overhang will act as handles, making it super easy to lift the brownies out of the pan once they’re baked. Spread the brownie batter evenly into the prepared baking pan. If you like, this is the perfect time to add any extra deliciousness! You could fold in another handful of chocolate chips, some chopped nuts like walnuts or pecans, or even some raspberries for a delightful sweet and tart contrast. Gently press any inclusions into the top of the batter.
Step 5: Baking and Cooling for Perfection
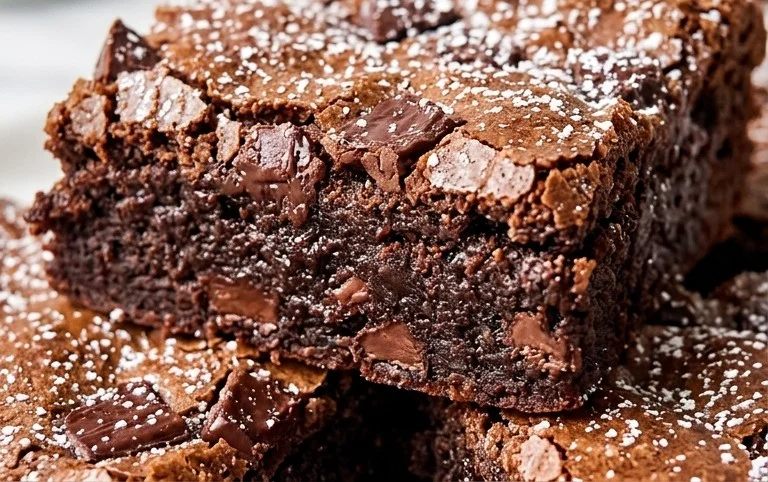
Bake the brownies for 25-30 minutes. The baking time can vary depending on your oven, so start checking around the 25-minute mark. You’ll know they’re ready when the edges are set and a toothpick inserted into the center comes out with moist crum extractbs attached, but not wet batter. If you prefer a more cake-like brownie, you can bake them a little longer until the toothpick comes out mostly clean. Once baked, resist the temptation to cut into them immediately! This is perhaps the hardest part. Let the brownies cool completely in the pan on a wire rack. This resting period allows the brownies to set up properly, ensuring that perfect fudgy texture. Once completely cooled, use the parchment paper overhang to lift the entire slab out of the pan. Cut into squares and prepare for brownie bliss. These sourdough brownies are incredible served on their own, or with a scoop of vanilla ice cream. Enjoy every single decadent bite!
Conclusion:
So there you have it – your guide to creating incredible sourdough brownies! This recipe offers a truly unique and delightful twist on a classic. The subtle tang from the sourdough starter not only adds complexity but also contributes to a wonderfully fudgy and moist texture that’s hard to resist. These sourdough brownies are a perfect balance of rich chocolatey goodness and that characteristic sourdough depth, making them a guaranteed crowd-pleaser. Whether you’re a seasoned baker or just starting out, I highly encourage you to give this recipe a try. You might just discover your new favorite dessert!
For serving, I love these warm, perhaps with a scoop of vanilla bean ice cream or a dollop of whipped cream. They also stand beautifully on their own as an afternoon treat with a cup of coffee. If you’re feeling adventurous, consider adding a handful of chocolate chips, chopped nuts, or even a sprinkle of sea salt on top before baking for an extra layer of flavor and texture. Don’t be afraid to experiment and make them your own!
Frequently Asked Questions about Sourdough Brownies:
Can I use active sourdough starter or discard?
You can use either! Active sourdough starter will likely give you a slightly more pronounced tang and contribute more to the leavening. Sourdough discard still works wonderfully and provides that essential flavor and moisture, though the tang might be a little milder.
How long do these sourdough brownies last?
Stored in an airtight container at room temperature, these brownies should stay fresh and delicious for about 3-4 days. For longer storage, you can refrigerate them for up to a week, or even freeze them for a couple of months!
Sourdough Brownies
Rich and fudgy sourdough brownies made with a sourdough starter discard for added depth of flavor and a delightful chew.
Ingredients
-
8 tablespoons unsalted butter
-
12 oz. semi sweet chocolate chips
-
1/2 cup dutched cocoa powder
-
2 teaspoons vanilla extract
-
2 large eggs
-
1 egg yolk
-
1 cup granulated sugar
-
1/2 cup dark brown sugar
-
1/2 cup sourdough starter discard
-
1 cup all-purpose flour
-
1 teaspoon salt
Instructions
-
Step 1
Preheat oven to 350°F (175°C). Grease and flour an 8×8 inch baking pan. -
Step 2
Melt butter and chocolate chips in a double boiler or in the microwave in 30-second intervals, stirring until smooth. -
Step 3
In a large bowl, whisk together eggs, egg yolk, granulated sugar, and dark brown sugar until well combined. Stir in vanilla extract. -
Step 4
Whisk the melted chocolate mixture into the egg mixture until smooth. Stir in the sourdough starter discard until just combined. -
Step 5
In a separate bowl, whisk together all-purpose flour, dutched cocoa powder, and salt. Gradually add the dry ingredients to the wet ingredients, mixing until just combined. Do not overmix. -
Step 6
Pour the batter into the prepared baking pan and spread evenly. -
Step 7
Bake for 25-30 minutes, or until a toothpick inserted into the center comes out with moist crumbs attached. -
Step 8
Let cool completely in the pan on a wire rack before cutting into squares.
Important Information
Nutrition Facts (Per Serving)
It is important to consider this information as approximate and not to use it as definitive health advice.
Allergy Information
Please check ingredients for potential allergens and consult a health professional if in doubt.