Sno Ball Brownies Recipe- Decadent Chocolate Delight
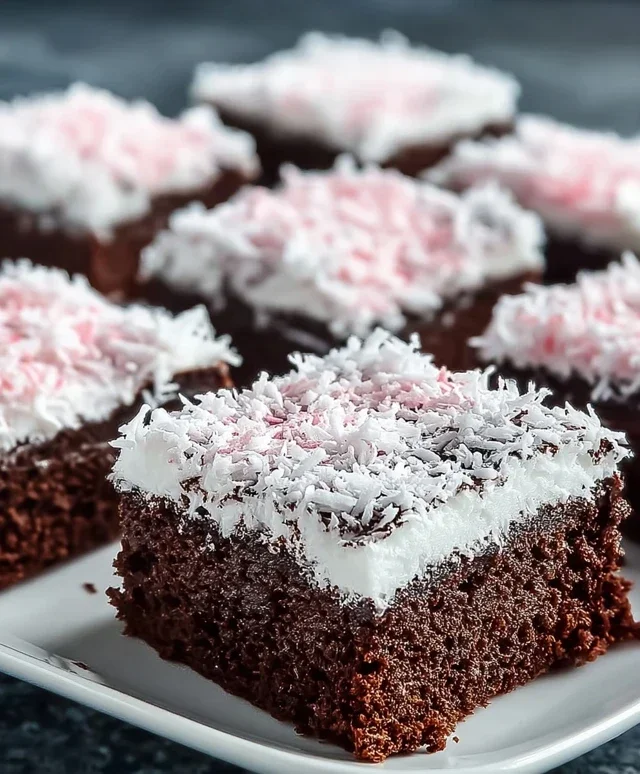
Sno Ball Brownies are a delightful indulgence that takes a classic comfort food and elevates it to an entirely new level of decadent bliss. Have you ever craved a brownie that’s not just fudgy and rich, but also whispers of creamy sweetness and a hint of coconut? That’s precisely the magic these Sno Ball Brownies deliver. It’s a recipe that consistently wins hearts because it taps into that nostalgic flavor profile of those iconic coconut-covered cakes, but reimagin extractes it in a familiar, beloved brownie form. What truly sets these Sno Ball Brownies apart is the ingenious combination of a deep, dark chocolate base with a fluffy, marshmallowy coconut topping. It’s a textural and flavor adventure that will have you reaching for just one more, and then another!
Get ready for a truly unforgettable dessert experience.
Sno Ball Brownies
Get ready to experience a taste of pure indulgence with these Sno Ball Brownies. Imagin extracte the rich, fudgy decadence of a classic brownie, elevated by the ethereal sweetness of marshmallow fluff and a delightful hint of coconut. This recipe is inspired by the beloved Sno Ball cake, but with all the comforting goodness of a homemade brownie. They’re surprisingly easy to make, making them perfect for a weekend baking project or a special treat to impress friends and family. The combination of textures and flavors is simply irresistible – a chewy, chocolatey base topped with a fluffy, coconut-kissed layer.
Ingredients:
Making the Perfect Brownie Base
The foundation of these Sno Ball Brownies is a rich, fudgy brownie. We’re going for that perfect balance of chewy edges and a moist, dense center.
Step 1: Melting the Chocolate and Butter
Begin extract by preheating your oven to 350°F (175°C). Grease and flour an 8×8 inch baking pan, or line it with parchment paper, leaving some overhang on the sides to make lifting the brownies out easier later. In a medium, heatproof bowl set over a saucepan of simmering water (a double boiler method), melt the 1/2 cup of butter and the 2 ounces of chopped unsweetened chocolate together. Stir gently until the mixture is completely smooth and glossy. It’s important to keep the water from touching the bottom of the bowl to prevent the chocolate from scorching. Once melted, remove the bowl from the heat and let it cool slightly for a few minutes. This step is crucial to avoid cooking the eggs when you add them in the next stage.
Step 2: Combining Wet and Dry Ingredients
To the slightly cooled chocolate and butter mixture, add the 1 cup of sugar and stir until well combined. Next, whisk in the 2 large eggs, one at a time, ensuring each egg is fully incorporated before adding the next. Stir in the 1/2 teaspoon of vanilla extract. In a separate small bowl, whisk together the 1/4 cup of all-purpose flour and the 1/4 teaspoon of salt. Gradually add the dry ingredients to the wet ingredients, stirring gently until just combined. Be careful not to overmix the batter at this stage; overmixing can lead to tough brownies. You want to see no streaks of flour remaining.
Step 3: Baking the Brownie Layer
Pour the brownie batter into your prepared baking pan and spread it evenly. Bake in the preheated oven for 20 to 25 minutes, or until a toothpick inserted into the center comes out with moist crum extractbs attached, but not wet batter. We want a slightly underbaked center as it will continue to cook as it cools and will be topped with a fluffy layer. Once baked, remove the brownies from the oven and let them cool completely in the pan on a wire rack. This cooling period is essential before adding the marshmallow topping. Rushing this step can result in a melted, messy topping.
Creating the Dreamy Marshmallow Topping
Now for the part that truly transforms these brownies into Sno Ball delights! We’ll create a fluffy, sweet topping reminiscent of the classic treat.
Step 4: Preparing the Marshmallow Mixture
Once the brownie base has cooled completely, it’s time to prepare the marshmallow topping. In a clean bowl, combine the 1 (7-ounce) jar of marshmallow fluff or creme with the 1 cup of sweetened shredded coconut. If you’re using the pink food coloring to achieve that iconic Sno Ball look, add 3 to 5 drops of pink food coloring to the marshmallow fluff and gently stir until you achieve your desired shade. It’s best to start with a few drops and add more if needed, as the color can intensify. This topping is incredibly easy to make, requiring no cooking.
Step 5: Assembling and Finishing
Gently spread the marshmallow and coconut mixture evenly over the cooled brownie layer, all the way to the edges of the pan. You can use the back of a spoon or an offset spatula to achieve a smooth surface. If you like, you can sprinkle a little extra shredded coconut on top for added texture and visual appeal. For an extra special touch, you can also drizzle some melted chocolate over the top once the marshmallow layer has set slightly. Chill the brownies in the refrigerator for at least 30 minutes to allow the marshmallow topping to set firmly. This will make them much easier to cut cleanly.
Once chilled, lift the brownies out of the pan using the parchment paper overhang. Place them on a cutting board and slice them into squares. These Sno Ball Brownies are best served chilled, but they are also delicious at room temperature. Enjoy the delightful combination of rich chocolate, chewy brownie, and sweet, fluffy marshmallow with a hint of coconut! They are a guaranteed crowd-pleaser.
Conclusion:
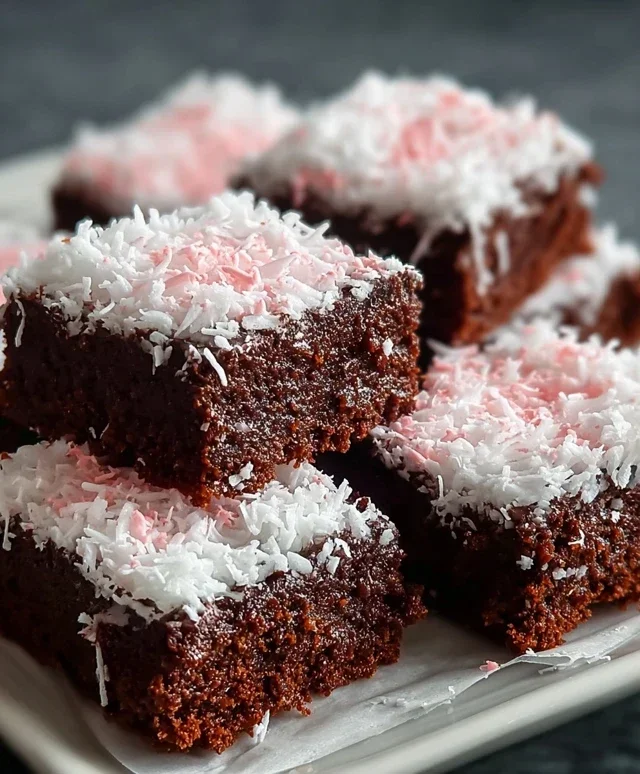
There you have it – the ultimate guide to creating these delightful Sno Ball Brownies! We’ve explored how these decadent treats perfectly capture the essence of the classic Sno Ball cake, infusing rich, fudgy brownies with the light, airy sweetness of coconut and marshmallow. The beauty of this recipe lies in its delightful texture contrast – that satisfying chew of the brownie meeting the fluffy, sweet topping. They’re not just brownies; they’re an experience!
These Sno Ball Brownies are incredibly versatile when it comes to serving. They’re divine on their own, of course, but imagin extracte them slightly warmed with a scoop of vanilla ice cream, or perhaps served alongside a steaming mug of hot chocolate for an extra layer of indulgence. For variations, don’t hesitate to experiment! You could add a hint of almond extract to the brownie batter for a subtle nuttiness, or even incorporate some shredded coconut directly into the brownie mix for an even more pronounced coconut flavor. Perhaps a swirl of pink frosting instead of white could be a fun visual twist. I truly encourage you to give this recipe a try. It’s a guaranteed crowd-pleaser and a wonderfully satisfying baking project for any skill level.
Frequently Asked Questions about Sno Ball Brownies:
Can I make these Sno Ball Brownies ahead of time?
Absolutely! Sno Ball Brownies are even better when they’ve had a chance to sit for a few hours or overnight. This allows the flavors to meld beautifully and the texture to fully set. Store them in an airtight container at room temperature.
What’s the best way to store leftover Sno Ball Brownies?
To keep your Sno Ball Brownies fresh and delicious, store them in an airtight container at room temperature for up to 3-4 days. If you live in a very warm climate, you might consider refrigerating them, but be aware that the coconut topping can become a bit firmer when chilled.
Sno Ball Brownies
Decadent brownies topped with a sweet coconut and marshmallow fluff layer, inspired by Sno Balls.
Ingredients
-
1/2 cup (1 stick) butter
-
2 ounces unsweetened chocolate, chopped
-
1 cup sugar
-
2 large eggs
-
1/2 teaspoon vanilla
-
1/4 cup all-purpose flour
-
1/4 teaspoon salt
-
1 (7-ounce) jar marshmallow fluff or creme
-
1 cup sweetened shredded coconut
-
1 tablespoon cornstarch
-
3 to 5 drops pink food coloring
Instructions
-
Step 1
Preheat oven to 350°F (175°C). Grease and flour an 8×8 inch baking pan. -
Step 2
In a double boiler or microwave-safe bowl, melt butter and unsweetened chocolate together. Stir until smooth. -
Step 3
In a large bowl, whisk together sugar, eggs, and vanilla. Beat in the melted chocolate mixture. -
Step 4
In a separate small bowl, whisk together flour and salt. Gradually add to the wet ingredients and mix until just combined. Do not overmix. -
Step 5
Pour batter into the prepared baking pan and spread evenly. Bake for 20-25 minutes, or until a toothpick inserted into the center comes out with moist crumbs. -
Step 6
While brownies are baking, in a medium bowl, combine marshmallow fluff, coconut, cornstarch, and pink food coloring. Mix until well combined and tinted pink. -
Step 7
Once brownies are out of the oven, immediately spread the marshmallow fluff mixture evenly over the warm brownies. Return to the oven for 5-7 minutes, or until the topping is lightly golden and puffy. -
Step 8
Let cool completely before cutting into squares.
Important Information
Nutrition Facts (Per Serving)
It is important to consider this information as approximate and not to use it as definitive health advice.
Allergy Information
Please check ingredients for potential allergens and consult a health professional if in doubt.