Garlic Butter Keto Bread Recipe-Irresistible Flavor
Garlic Butter Keto Bread is about to become your new best friend in the kitchen. If you’ve been navigating the keto lifestyle, you know the constant craving for satisfying, low-carb alternatives. And let’s be honest, sometimes you just want a warm, comforting slice of bread to dip into your favorite soup or slather with more butter. This garlic butter keto bread delivers all of that, and then some! It’s incredibly easy to make, requiring no fancy ingredients or complicated techniques. What truly sets this recipe apart is the irresistible aroma that fills your kitchen as it bakes, followed by that perfect golden crust and a tender, fluffy interior, all infused with that glorious garlic butter goodness. Prepare to be amazed by how quickly this loaf disappears!
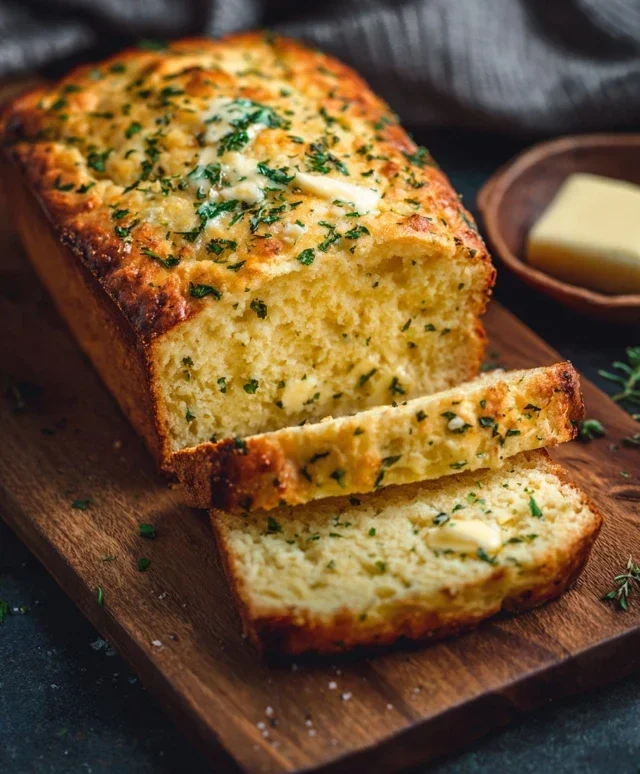
Garlic Butter Keto Bread
There’s something incredibly comforting about a warm slice of bread, isn’t there? For many of us following a ketogenic lifestyle, that simple pleasure can feel like a distant memory. But what if I told you that you can enjoy that satisfying, buttery, garlicky goodness without derailing your keto goals? Enter my Garlic Butter Keto Bread. This recipe is a game-changer, delivering a fluffy, tender crum extractb with a rich, savory flavor that will have you reaching for seconds. It’s perfect as a side to your favorite keto meals, toasted with a smear of more butter (why not!), or even as the base for a mini keto pizza. Get ready to rediscover the joy of bread, keto-style!
This recipe relies on a blend of low-carb flours and a touch of psyllium husk to achieve that desirable bread-like texture. The garlic and butter are, of course, the stars of the show, infusing every bite with irresistible aroma and taste. Don’t be intimidated by the ingredient list; many of these are pantry staples for keto bakers, and the process is surprisingly straightforward. Let’s get baking!
Ingredients:
The Baking Process
Let’s break down how to create this delicious keto bread. Follow these steps carefully, and you’ll be rewarded with a fantastic loaf.
1. Preheating and Preparation: The first crucial step is to preheat your oven to 350°F (175°C). This ensures that when your bread goes in, it starts baking immediately and evenly. While the oven heats up, take an 8×4 inch loaf pan and grease it thoroughly with butter or cooking spray. For easier removal, you can also line the pan with parchment paper, leaving some overhang on the sides to act as handles. This step is essential to prevent sticking and to make unmolding your beautiful loaf a breeze.
2. Combining the Dry Ingredients: In a large mixing bowl, whisk together the almond flour, coconut flour, psyllium husk powder, baking powder, sea salt, and garlic powder. It’s important to use psyllium husk powder and not whole husks, as the powder will incorporate more smoothly and contribute to a better texture. Make sure everything is well combined; no one wants pockets of baking powder or salt in their bread! Whisking also helps to aerate the dry ingredients, which can contribute to a lighter loaf.
3. Combining the Wet Ingredients and Dough Formation: In a separate, smaller bowl, whisk together the melted butter, warm water, room temperature eggs, and apple cider vinegar. The warm water helps to activate the psyllium husk and baking powder, while the apple cider vinegar reacts with the baking powder to create lift and a slightly tender crum extractb. Whisk until everything is well incorporated. Now, pour the wet ingredients into the bowl with the dry ingredients. Add the minced garlic. Using a sturdy spoon or spatula, mix until a thick, cohesive dough forms. Don’t overmix; just combine until no dry streaks remain. The dough will be sticky, and that’s perfectly normal. This is where the psyllium husk really does its magic, absorbing moisture and giving the bread structure.
4. Shaping and Baking: Transfer the dough to your prepared loaf pan. It will be quite sticky, so you can use a spatula or your hands (lightly greased with oil or butter) to spread it evenly. Smooth the top as best you can. If you’re feeling fancy, you can sprinkle a little extra chopped parsley on top for visual appeal, or even a pinch of flaky sea salt. Place the loaf pan on a baking sheet (this catches any potential drips and makes it easier to handle). Bake for 40-50 minutes, or until the top is golden brown and a toothpick inserted into the center comes out clean. The exact baking time will depend on your oven, so start checking around the 40-minute mark.
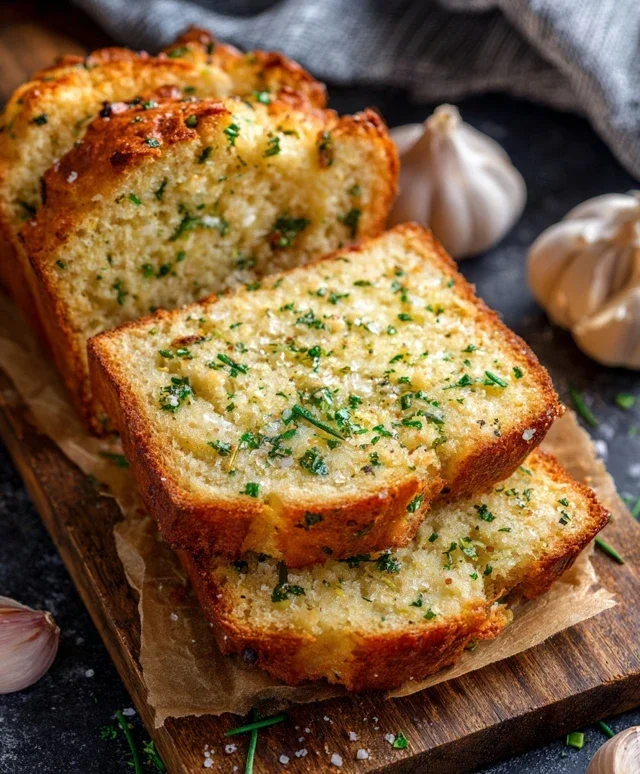
5. Cooling and Finishing: Once baked, carefully remove the loaf pan from the oven. Let the bread cool in the pan for about 10-15 minutes. This allows it to firm up slightly. Then, use the parchment paper handles (or carefully invert the pan) to remove the bread from the pan and place it on a wire rack to cool completely. This is a crucial step for texture. If you slice it while it’s too warm, it can be gummy. Once cooled, brush the top generously with more melted butter. If you like an even more intense garlic flavor, you can mix a little more minced garlic into the melted butter before brushing. Slice and enjoy! This bread is best served fresh, but leftovers can be stored in an airtight container at room temperature for a day or two, or in the refrigerator for longer. Reheating in a toaster or oven brings back its wonderful aroma and texture.
Conclusion:
I hope you’re as excited as I am to bake this incredibly delicious Garlic Butter Keto Bread! This recipe truly shines because it delivers on that satisfying, comforting bread experience without the carbs. The combination of rich butter, pungent garlic, and the unique texture of keto-friendly flours creates a loaf that’s both incredibly flavorful and wonderfully versatile. It’s moist, has a beautiful golden crust, and the aroma while it bakes is simply irresistible.
This Garlic Butter Keto Bread is perfect for so many occasions. Enjoy it toasted with a smear of butter for a simple breakfast, or use it as the base for your favorite avocado toast. It makes an excellent side for soups and stews, and is absolutely divine when dipped in olive oil or used to create mini garlic breadsticks for your next gathering. Don’t be afraid to get creative with your toppings – a sprinkle of fresh herbs like parsley or chives after baking adds a lovely freshness.
I truly encourage you to give this recipe a try. It’s a game-changer for anyone following a ketogenic lifestyle and craving that familiar bread comfort. You’ll be amazed at how easy it is to achieve such fantastic results. Happy baking!
Frequently Asked Questions:
Can I make this bread ahead of time?
Yes, you can definitely make this Garlic Butter Keto Bread ahead of time. Once cooled completely, store it in an airtight container at room temperature for up to 2-3 days, or in the refrigerator for up to a week. It also freezes beautifully; wrap it tightly in plastic wrap and then in foil, and it will keep for up to 2-3 months. Thaw at room temperature or gently reheat in the oven.
What kind of keto-friendly flours can I use?
The recipe as written uses a blend of almond flour and coconut flour, which provides a great texture. If you have allergies or prefer alternatives, you can often substitute with a 1:1 keto flour blend, ensuring it contains ingredients like psyllium husk or flax meal for binding. Experimentation might be needed as different blends can absorb moisture differently.
How do I ensure the bread doesn’t taste too “eggy”?
The generous amount of garlic and butter in this recipe significantly masks any potential eggy flavor. However, if you’re particularly sensitive, using room temperature eggs and ensuring they are well incorporated into the batter helps. Some people also find that adding a touch of apple cider vinegar can help neutralize any subtle eggy notes.
Garlic Butter Keto Bread
A quick and easy keto-friendly bread recipe that’s bursting with garlic butter flavor.
Ingredients
-
2 cups almond flour
-
1/2 cup coconut flour
-
1 teaspoon baking powder
-
1 teaspoon salt
-
4 tablespoons unsalted butter, melted
-
2 large eggs
-
1/4 cup water
-
2 tablespoons minced garlic
-
2 tablespoons chopped fresh parsley
Instructions
-
Step 1
Preheat oven to 350°F (175°C). Grease and flour a loaf pan. -
Step 2
In a large bowl, whisk together almond flour, coconut flour, baking powder, and salt. -
Step 3
In a separate bowl, whisk together melted butter, eggs, and water until well combined. -
Step 4
Pour the wet ingredients into the dry ingredients and mix until a dough forms. Fold in minced garlic and chopped parsley. -
Step 5
Transfer the dough to the prepared loaf pan and spread evenly. -
Step 6
Bake for 25-30 minutes, or until a toothpick inserted into the center comes out clean. -
Step 7
Let cool in the pan for 10 minutes before transferring to a wire rack to cool completely.
Important Information
Nutrition Facts (Per Serving)
It is important to consider this information as approximate and not to use it as definitive health advice.
Allergy Information
Please check ingredients for potential allergens and consult a health professional if in doubt.