Easy Chocolate Swiss Roll Recipe – Simple & Delicious
Easy Chocolate Swiss Roll. Who doesn’t adore a classic dessert that looks impressive but is surprisingly simple to make? I know I do! There’s something incredibly satisfying about rolling up a tender, chocolatey sponge cake with a cloud of whipped cream, creating a beautiful spiral that screams celebration. What makes an Easy Chocolate Swiss Roll so universally loved? It’s the perfect balance of rich chocolate flavor in the cake, the light and airy cream filling, and that delightful texture. It’s a dessert that feels fancy enough for a special occasion but approachable for a cozy afternoon treat. This particular Easy Chocolate Swiss Roll recipe is designed to banish any intimidation factor, proving that you can create a showstopper in your own kitchen with minimal fuss. Get ready to impress yourself and everyone you share this with!
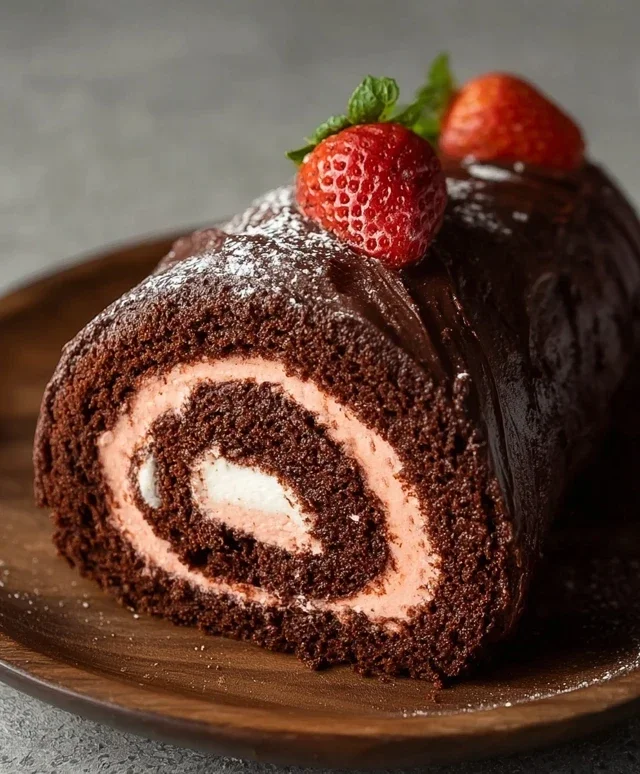
Easy Chocolate Swiss Roll
Are you craving a decadent dessert that looks impressive but is surprisingly simple to make? Look no further than this Easy Chocolate Swiss Roll! This recipe is perfect for those with dietary restrictions, being completely vegan and using oat flour for a slightly healthier twist. The rich chocolate sponge, light and fluffy filling, and vibrant strawberry garnish make this a truly delightful treat that will wow your friends and family. Don’t be intimidated by the “Swiss Roll” name; this recipe breaks it down into easy-to-follow steps, ensuring a successful bake every time. We’re using aquafaba for a fantastic egg-free meringue, creating a wonderfully tender cake. Let’s get baking!
Ingredients:
Chocolate Sponge
1. Preheat your oven to 175°C (350°F). Lightly grease a 25×35 cm (10×14 inch) baking tray and line it with parchment paper, ensuring the parchment extends slightly up the sides. This will make it easier to lift the cake out later.
2. In a medium bowl, whisk together the oat flour, cassava flour, 30g of cocoa powder, arrowroot starch, baking powder, and baking soda. Make sure there are no lumps, especially in the cocoa powder. Set this dry mixture aside.
3. In a separate large bowl, using an electric mixer, beat the aquafaba on medium-high speed. Gradually add 100g of the granulated sugar (or coconut sugar), one tablespoon at a time, while continuing to beat. Beat until stiff, glossy peaks form, similar to a meringue. This process can take about 5-8 minutes. It’s crucial to get this aquafaba mixture really stable, as it’s what gives our cake its lift and delicate texture without eggs.
4. Gently fold the unsweetened applesauce and dairy-free yogurt into the aquafaba mixture. Don’t overmix; you want to keep as much air in the mixture as possible.
5. Now, it’s time to combine the wet and dry ingredients. Add the dry flour mixture to the wet aquafaba mixture in two or three additions. Fold gently using a spatula until just combined. Be careful not to overmix, as this can lead to a tough cake. The batter should be smooth and pourable.
6. Pour the batter evenly into the prepared baking tray, spreading it out gently with a spatula to ensure an even layer. Tap the tray lightly on the counter a couple of times to release any large air bubbles.
7. Bake for 15-20 minutes, or until a toothpick inserted into the center comes out clean. The cake should be lightly golden and spring back when gently pressed. While the cake is baking, prepare your rolling station. Lay a clean, lint-free kitchen towel flat on your work surface and generously dust it with the 2 tablespoons of cocoa powder. This step is vital to prevent the cake from sticking to the towel as it cools and rolls.
8. As soon as the cake comes out of the oven, carefully invert it onto the prepared cocoa-dusted towel. Gently peel off the parchment paper. Let the cake cool completely on the towel. This cooling process on the towel is essential for creating a flexible cake that won’t crack when rolled.
Strawberry Cream Filling
1. Ensure your vegan butter, dairy-free yogurt, and the coconut fat from the coconut cream are all at room temperature. This is key for a smooth and creamy frosting.
2. In a large bowl, beat the softened vegan butter with an electric mixer until light and fluffy.
3. Add the coconut fat from the chilled can of coconut cream. If you haven’t chilled your coconut cream, scoop out the solid cream from the top, leaving the water behind. Beat this into the vegan butter until well combined and creamy.
4. Gradually add the pulsed freeze-dried strawberries. This ingredient not only adds a beautiful pink hue but also an intense strawberry flavor and a slight tartness that complements the chocolate perfectly. Beat until fully incorporated and the frosting is smooth. You should have a luscious, pink strawberry cream.
Assembly
1. Once the chocolate sponge is completely cool on the towel, it’s time for assembly. Spread the strawberry cream filling evenly over the cooled cake, leaving a small border (about 1-2 cm) around the edges. Be generous with the filling, but don’t overload it, as it might squeeze out when you roll the cake.
2. Starting from one of the longer sides, carefully begin extract to roll up the cake, using the towel to help guide and support it. Roll it tightly but gently, trying not to crack the sponge. If you notice any small cracks, don’t worry; the frosting will help hide them.
3. Once rolled, carefully transfer the Swiss roll to a serving platter, seam-side down. You can wrap it in plastic wrap or foil and refrigerate for at least 30 minutes to allow the filling to set, which will make it easier to slice.
4. Before serving, you can dust the top with a little extra cocoa powder or powdered sugar if desired. Arrange the sliced strawberries on top or alongside the roll for a beautiful presentation. Slice with a sharp knife, wiping the blade between cuts for clean slices. Enjoy your homemade Easy Chocolate Swiss Roll!
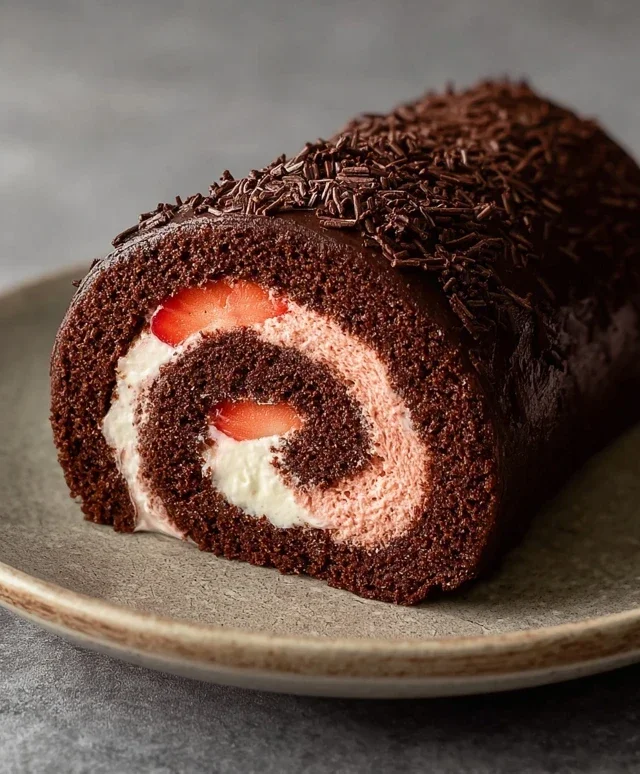
Conclusion:
And there you have it – your very own, impossibly easy Chocolate Swiss Roll! I hope you’ve enjoyed this recipe walkthrough as much as I’ve enjoyed sharing it. This dessert truly is a showstopper that looks far more complicated than it actually is. The light and airy sponge, infused with rich chocolate flavor, pairs perfectly with a creamy filling, making it an absolute delight for any occasion. Whether you’re a baking novice or a seasoned pro, this easy Chocolate Swiss Roll is guaranteed to impress your friends and family with minimal fuss.
I love serving slices of this beautiful roll with a dollop of whipped cream and fresh berries, or even a dusting of cocoa powder for an extra touch of elegance. For variations, don’t be afraid to experiment with different fillings! A raspberry jam swirl, a coffee-infused cream, or even a subtle hint of orange zest could elevate this already wonderful treat. The possibilities are endless! So please, give this recipe a try. I promise you won’t regret the delicious results and the immense satisfaction of creating something so spectacular right in your own kitchen.
Frequently Asked Questions:
Why did my Swiss roll crack when I rolled it?
Cracking often happens if the sponge is overbaked, making it too dry and brittle. Alternatively, if you let the sponge cool completely before rolling, it loses its flexibility. Try to roll it while it’s still warm but not hot to the touch. Also, ensuring you score the sponge lightly before rolling can help prevent large cracks.
Can I make the Swiss roll ahead of time?
Absolutely! You can bake and cool the sponge cake a day in advance and store it wrapped tightly in plastic wrap at room temperature. Prepare your filling and store it separately in the refrigerator. Then, on the day you plan to serve, assemble your easy Chocolate Swiss Roll. This makes hosting much less stressful!
What kind of chocolate should I use for the sponge?
For the best flavor, I recommend using a good quality unsweetened cocoa powder. If you prefer to use melted chocolate, opt for a semi-sweet or bittersweet chocolate that you enjoy eating. Avoid milk chocolate in the batter as it can alter the texture and might make the sponge too sweet.
Easy Chocolate Swiss Roll
A simple and delicious dairy-free and gluten-free chocolate Swiss roll, perfect for a special occasion or a delightful dessert.
Ingredients
-
135 g oat flour
-
30 g cassava flour
-
30 g cocoa powder
-
1 tbsp arrowroot starch
-
1 1/2 tsp baking powder
-
1/2 tsp baking soda
-
122 mL aquafaba, room temperature
-
200 g organic granulated sugar or coconut sugar, divided
-
100 g unsweetened applesauce, room temperature
-
60 g unsweetened dairy free yogurt, room temperature
-
2 tbsp cocoa powder for dusting the dish towel
-
1 cup sliced strawberries, for garnish
-
226 g vegan butter, room temperature
-
70 g freeze dried strawberries, pulsed into a flour
-
Coconut fat from 1 can full-fat coconut cream
Instructions
-
Step 1
Preheat oven to 350°F (175°C). Line a 10×15 inch baking pan with parchment paper and lightly grease. Dust a clean kitchen towel with 2 tbsp cocoa powder. -
Step 2
In a large bowl, whisk together oat flour, cassava flour, 30g cocoa powder, arrowroot starch, baking powder, and baking soda. -
Step 3
In a separate bowl, beat aquafaba until foamy. Gradually add 100g of the sugar and continue beating until stiff peaks form. Fold in applesauce and dairy-free yogurt. -
Step 4
Gently fold the dry ingredients into the wet ingredients until just combined. Pour batter into the prepared pan and spread evenly. Bake for 12-15 minutes, or until a toothpick inserted into the center comes out clean. -
Step 5
While the cake is baking, prepare the filling. In a bowl, beat vegan butter until creamy. Add the remaining 100g sugar, pulsed freeze-dried strawberries, and coconut fat. Beat until smooth and fluffy. Chill slightly if too soft. -
Step 6
Immediately after the cake comes out of the oven, invert it onto the cocoa-dusted towel. Carefully peel off the parchment paper. Let it cool for about 5 minutes, then gently roll the cake up with the towel. Let it cool completely. -
Step 7
Unroll the cooled cake. Spread the filling evenly over the cake, leaving a small border. Re-roll the cake tightly without the towel. Chill for at least 30 minutes before slicing and serving. Garnish with sliced strawberries.
Important Information
Nutrition Facts (Per Serving)
It is important to consider this information as approximate and not to use it as definitive health advice.
Allergy Information
Please check ingredients for potential allergens and consult a health professional if in doubt.