Fried Strawberry Cheesecake Sandwiches-Sweet Treat
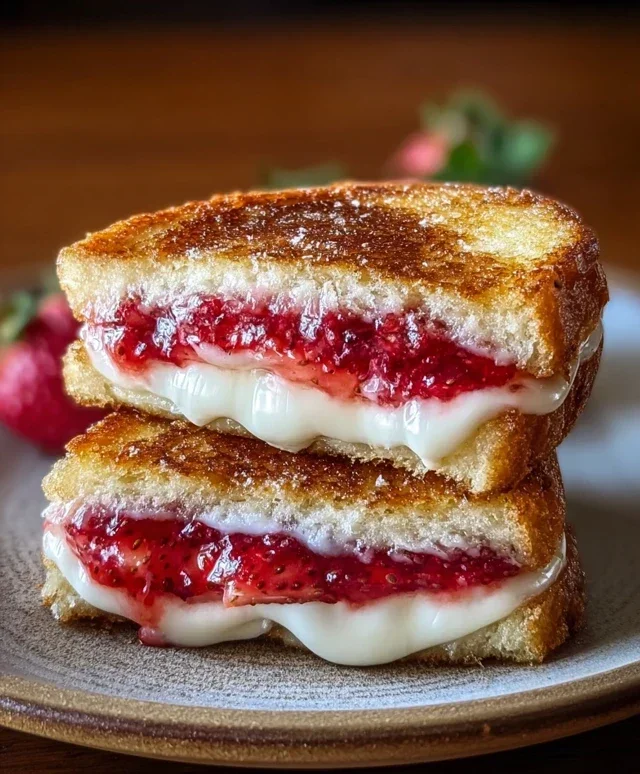
Fried Strawberry Cheesecake Sandwiches are about to become your new obsession. Forget everything you thought you knew about dessert; this is a game-changer. Imagin extracte the creamy, dreamy interior of cheesecake, bursting with sweet, slightly tart strawberries, all encased in a crispy, golden-brown exterior. It’s the ultimate indulgence, a textural masterpiece that hits every single craving. People adore this dish because it takes two universally loved concepts – cheesecake and delicious fried treats – and elevates them to a whole new level. The combination of warm, gooey filling against that satisfying crunch is simply irresistible. We’re talking about a dessert that’s both decadent and surprisingly fun to eat, perfect for impressing guests or just treating yourself after a long week. Get ready to discover why these Fried Strawberry Cheesecake Sandwiches are so incredibly special and how you can easily bring this magic to your own kitchen.
Get ready for a flavor explosion!
Fried Strawberry Cheesecake Sandwiches
Get ready to experience a dessert that’s pure indulgence! These Fried Strawberry Cheesecake Sandwiches are a delightful twist on classic cheesecake, transforming creamy, sweet goodness into a warm, crispy, and utterly decadent treat. Imagin extracte the rich flavor of cheesecake, studded with vibrant strawberries, all encased in buttery, golden-fried brioche. It’s like a hug for your taste buds, perfect for a special occasion or simply when you need a serious dose of happy. We’re going to walk through how to create these little parcels of joy, step by step, so you can impress yourself and anyone lucky enough to share them with you.
Ingredients:
Cooking Instructions
Let’s dive into the delicious process of making these incredible sandwiches.
Preparing the Cheesecake Filling
The heart of our sandwich is a simple yet luscious cream cheese filling. Start by making sure your cream cheese has been sitting out at room temperature for at least 30 minutes to an hour. This is crucial for achieving a smooth, lump-free filling. In a medium bowl, combine the softened cream cheese with the 2 tablespoons of powdered sugar. Using a fork or a hand mixer on low speed, beat the cream cheese and powdered sugar together until they are thoroughly combined and wonderfully smooth. Don’t overmix, as we don’t want to incorporate too much air at this stage. Gently fold in the thinly sliced fresh strawberries and the ¼ cup of strawberry preserves. The preserves will add an extra burst of strawberry flavor and a lovely color to the filling, while the fresh slices provide a delightful texture contrast. Mix just enough to distribute them evenly throughout the cream cheese mixture. Set this aside.
Assembling the Sandwiches
Now for the fun part – assembling our sweet sandwiches! Lay out four of the thick slices of brioche or challah bread on a clean work surface. These sturdy slices are perfect for holding our delicious filling. Evenly spread the prepared strawberry cheesecake filling onto these four slices, making sure to get close to the edges. The goal is to have a generous, but not overflowing, amount of filling on each slice. Top each of these filled slices with one of the remaining plain bread slices, creating four senon-alcoholic aled sandwiches. Gently press down on the top slice of bread to help the filling settle and to ensure the sandwich holds together.
Creating the Custard Bath
To achieve that perfect golden-fried exterior, we need to dip our sandwiches in a rich custard. In a shallow dish or pie plate, whisk together the 2 large eggs and 3 tablespoons of whole milk until well combined. Ensure there are no streaks of egg white or yolk remaining. The eggs, straight from the fridge, will help maintain the structure of the custard and prevent it from becoming too thin. This simple mixture will soak into the bread, giving it that irresistible custardy flavor and enabling it to fry up beautifully crisp.
Frying the Sandwiches to Golden Perfection
Heat a large non-stick skillet or griddle over medium heat. Add the 2 tablespoons of butter to the hot pan and let it melt, swirling it around to coat the surface. Once the butter is melted and slightly shimmering, it’s time to fry! Carefully take one assembled sandwich at a time and dip both sides into the egg and milk mixture, allowing it to soak for about 15-20 seconds per side. You want the bread to absorb some of the custard but not become completely soggy. Immediately place the dipped sandwich onto the hot, buttered skillet. Repeat this process with the remaining sandwiches, working in batches if necessary to avoid overcrowding the pan, which can lower the temperature and lead to uneven cooking.
Fry each sandwich for approximately 3-4 minutes per side, or until it’s a beautiful golden brown and the filling is warm and slightly gooey. Keep an eye on the heat and adjust as needed. If the sandwiches are browning too quickly, reduce the heat slightly. If they’re not browning enough, you might need to increase it a touch. The goal is a perfectly toasted exterior with a warm, creamy interior.
Finishing Touches and Serving
Once your Fried Strawberry Cheesecake Sandwiches are golden brown and delicious, carefully remove them from the skillet and place them on a plate lined with paper towels to absorb any excess butter. While they are still warm, dust them generously with extra powdered sugar. This final touch adds a beautiful visual appeal and a sweet crunch. Serve these delightful sandwiches immediately while they are warm and the cheesecake filling is wonderfully melty. They are absolutely divine on their own, but you could also serve them with a dollop of whipped cream or a few extra fresh strawberries for an even more luxurious dessert experience. Enjoy every single bite of this incredible treat!
Conclusion:
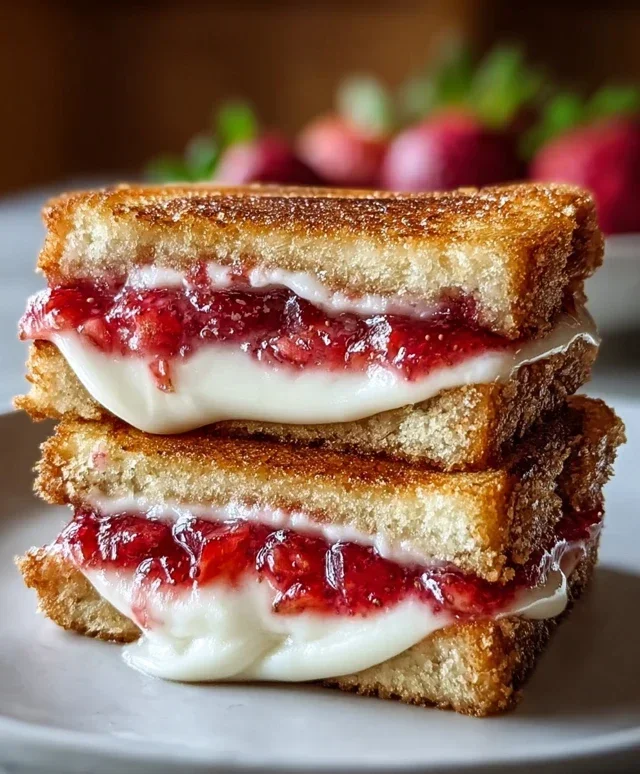
There you have it – your guide to creating the most decadent and surprisingly simple Fried Strawberry Cheesecake Sandwiches! This recipe is a true winner because it takes two beloved desserts and combines them into a single, utterly irresistible treat. The crispy, golden exterior, achieved by pan-frying thick slices of bread, gives way to a creamy, luscious strawberry cheesecake filling that is simply divine. It’s a dessert that’s perfect for impressing guests, celebrating a special occasion, or simply indulgin extractg your sweet tooth. For serving, I love them dusted with a little powdered sugar and maybe a dollop of fresh whipped cream or a side of extra strawberry compote. If you’re feeling adventurous, consider adding a pinch of cinnamon to the filling, using different types of berries, or even incorporating a swirl of chocolate ganache before frying. I truly encourage you to give these Fried Strawberry Cheesecake Sandwiches a try; you won’t regret it!
Frequently Asked Questions:
Can I make these ahead of time?
While the cheesecake filling can certainly be made ahead and stored in the refrigerator, I highly recommend frying the sandwiches just before serving. This ensures the bread stays perfectly crispy and the filling is warm and gooey.
What kind of bread works best?
A sturdy bread like challah, brioche, or even thick-cut white bread works wonderfully. You want something that can hold its shape and absorb some of the delicious filling without becoming soggy.
Fried Strawberry Cheesecake Sandwiches
A decadent and easy-to-make dessert featuring creamy cheesecake filling and fresh strawberries sandwiched between buttery, fried brioche bread.
Ingredients
-
8 thick slices of brioche or challah bread
-
2 tablespoons butter, for the pan
-
4 ounces cream cheese, left out to soften
-
2 tablespoons powdered sugar, plus extra for the final touch
-
1/2 cup fresh strawberries, cut into thin slices
-
1/4 cup strawberry preserves
-
2 large eggs, straight from the fridge
-
3 tablespoons whole milk
Instructions
-
Step 1
In a medium bowl, beat the softened cream cheese and powdered sugar until smooth and creamy. -
Step 2
Gently fold in the sliced strawberries and strawberry preserves into the cream cheese mixture. -
Step 3
Spread the cream cheese mixture evenly onto four slices of bread. Top with the remaining four slices of bread to create sandwiches. -
Step 4
In a shallow dish, whisk together the eggs and milk until well combined. -
Step 5
Melt butter in a large skillet over medium heat. Dip each sandwich into the egg mixture, ensuring both sides are coated. Place coated sandwiches in the hot skillet. -
Step 6
Cook for 3-4 minutes per side, until golden brown and the filling is warm. -
Step 7
Serve immediately, dusted with extra powdered sugar if desired.
Important Information
Nutrition Facts (Per Serving)
It is important to consider this information as approximate and not to use it as definitive health advice.
Allergy Information
Please check ingredients for potential allergens and consult a health professional if in doubt.