Hanami Dango Recipe – Delicious Japanese Sweet Skewers
Hanami Dango
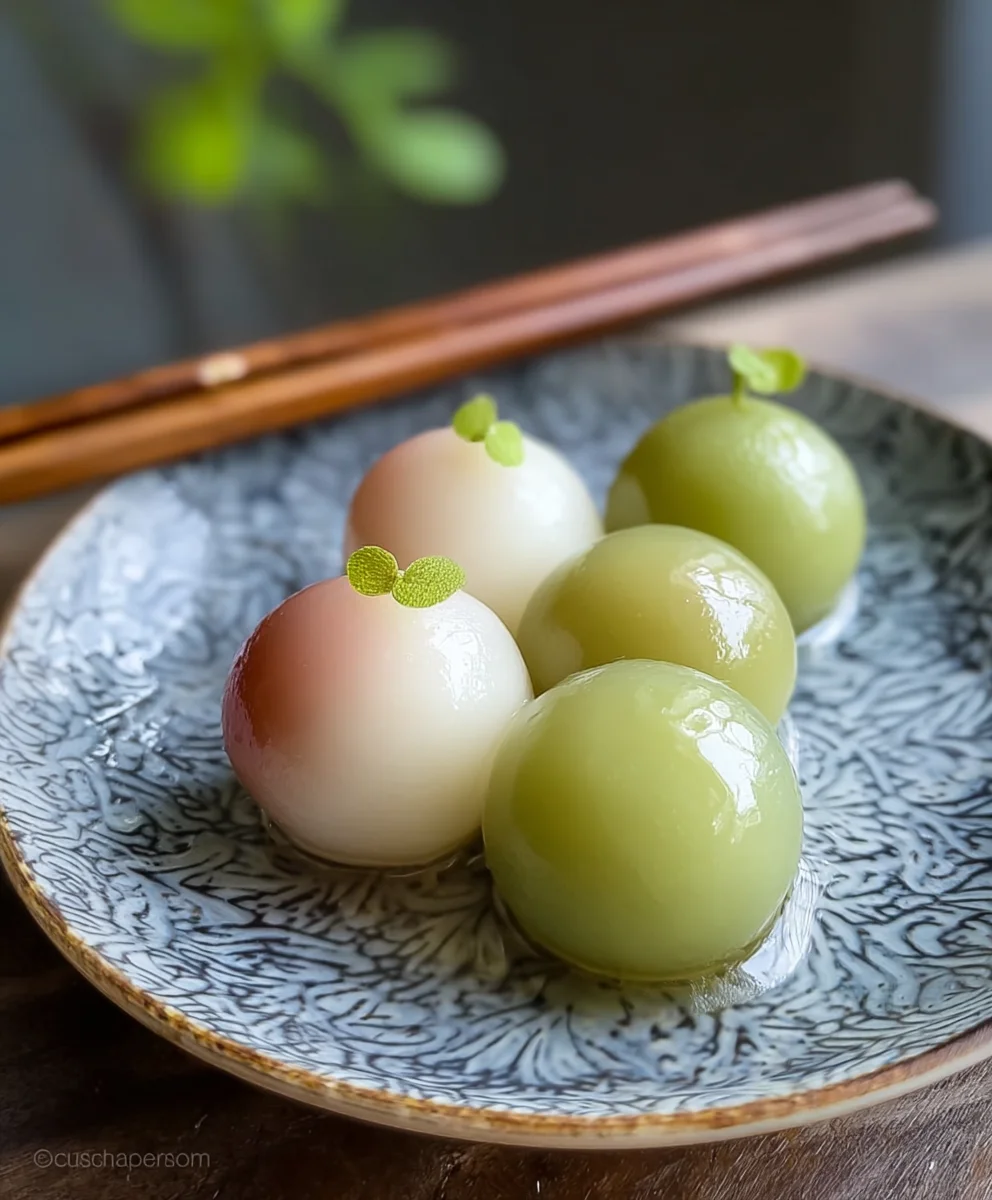
There are few things that capture the ephemeral beauty of spring quite like Hanami Dango. These delightful, three-colored mochi skewers are more than just a sweet treat; they are a vibrant symbol of Japan’s beloved cherry blossom viewing season, known as ‘hanami’. Imagin extracte a picnic spread beneath a canopy of delicate pink blossoms, the gentle breeze rustling through the trees, and in your hand, these perfectly formed, chewy morsels. It’s no wonder Hanami Dango holds such a special place in the hearts of many. The sheer visual appeal, with its harmonious blend of pink, white, and green, is instantly captivating, evoking the very essence of spring’s rebirth. What makes this particular confection so magical is its simplicity combined with its profound cultural significance. Each bite is a taste of tradition, a celebration of nature’s fleeting artistry, and a reminder to savor the present moment.
Ingredients:
- 1 1/3 cups Joshinko rice flour (non-glutinous)
- 1 1/2 cups Shiratamako sweet glutinous rice flour
- 3/4 cup powdered sugar (optional, for added sweetness)
- 1 1/3 cups hot water
- 1 teaspoon matcha powder
- 1 teaspoon water (for mixing with matcha)
- 1 drop pink food coloring
- Wooden skewers (for serving)
Preparing the Dango Dough
Mixing the Flours
The foundation of perfect Hanami Dango lies in the careful combination of two types of rice flour. We’ll start by combining the Joshinko rice flour, which provides a slightly chewy and firm texture, with the Shiratamako sweet glutinous rice flour. Shiratamako is essential for the characteristic soft and sticky nature of dango. In a large mixing bowl, add the 1 1/3 cups of Joshinko and 1 1/2 cups of Shiratamako. If you prefer a sweeter dango, now is the time to incorporate the 3/4 cup of powdered sugar. Whisk these dry ingredients together thoroughly until they are evenly distributed. This ensures that the sugar, if used, is incorporated into every part of the dough and prevents clumps.
Adding Hot Water
Next, we’ll introduce the hot water to hydrate the flours. Gradually add the 1 1/3 cups of hot water to the flour mixture while stirring with a spoon or spatula. It’s important to use hot water, not boiling, as this helps to activate the starches in the rice flour and create a pliable dough. Continue stirring until a shaggy dough begin extracts to form. Don’t worry if it looks a bit rough at this stage. Once it’s cool enough to handle, switch to using your hands.
Kneading the Dough
Now comes the kneading. Turn the dough out onto a clean, lightly floured surface. Knead the dough for about 5-7 minutes, or until it becomes smooth and elastic. You’ll know it’s ready when it’s no longer sticky and can be easily shaped without tearing. Think of it like kneading bread, but with rice flour. If the dough feels too dry and crum extractbly, add a tiny bit more hot water, a teaspoon at a time. Conversely, if it’s too sticky, dust your hands and the surface with a little more Joshinko flour. The goal is a pliable, consistent texture that you can easily mold.
Dividing and Coloring the Dough
Portioning the Dough
Once your main dough is perfectly smooth, it’s time to divide it for coloring. We’ll aim for three equal portions, as is traditional for Hanami Dango. Take your large ball of dough and divide it into three roughly equal pieces. You can eyeball this, or for precision, use a kitchen scnon-alcoholic ale. Place each portion into a separate small bowl.
Creating the Colors
Now for the vibrant Hanami Dango colors! For the white portion, you don’t need to do anything further. For the green, in a tiny separate bowl, combine the 1 teaspoon of matcha powder with the 1 teaspoon of water. Stir this into a smooth paste. Then, take one of your dough portions and knead in the matcha paste until the color is uniform throughout. Be sure to work the paste in thoroughly to avoid streaks. For the pink portion, simply add the 1 drop of pink food coloring to the remaining dough portion and knead until you achieve a beautiful, soft pink hue. Again, ensure the color is evenly distributed. If you want a more intense pink, you can add another drop, but start with one.
Shaping and Cooking the Dango
Rolling the Dango Balls
With your three colored dough balls ready, it’s time to shape them into the classic dango spheres. Take a piece of dough (let’s start with white) and roll it between your palms to form a small, smooth ball, about 1 inch in diameter. Repeat this process for the green and pink dough. Aim for consistency in size so that they cook evenly and look beautiful when skewered. You should have a total of about 12-15 balls, depending on how large you make them.
Boiling the Dango
Fill a medium saucepan with water and bring it to a rolling boil over medium-high heat. Carefully drop the dango balls into the boiling water. Don’t overcrowd the pot; cook them in batches if necessary. As the dango cook, they will sink to the bottom. You’ll know they’re ready when they float to the surface. This usually takes about 3-5 minutes after they start floating.
Shocking and Skewering
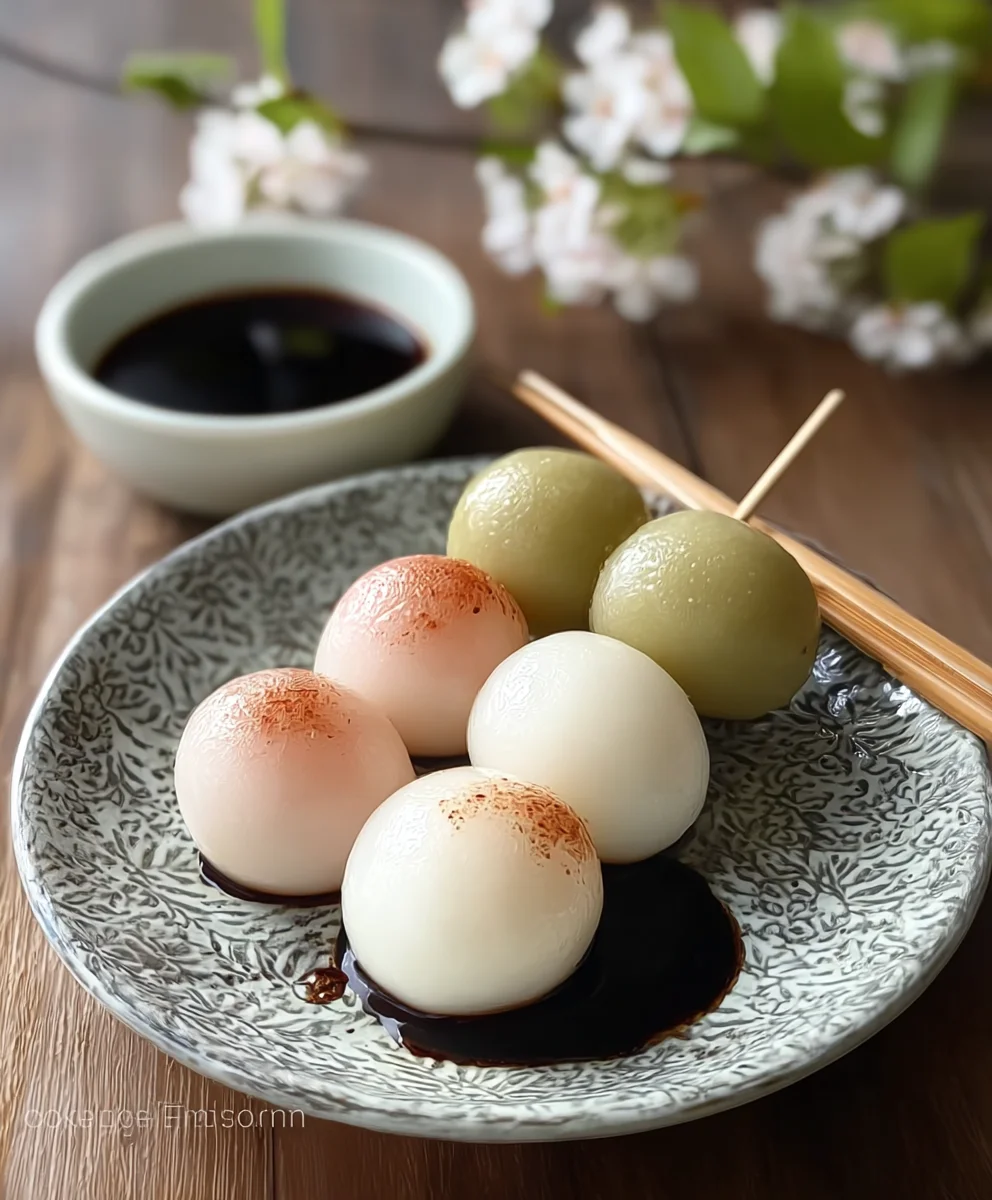
Once the dango have floated to the top, use a slotted spoon to carefully remove them from the boiling water. Immediately transfer them to a bowl filled with ice-cold water. This “shocking” process stops the cooking and gives the dango a firmer, more pleasant texture. Let them sit in the ice bath for a minute or two. After they’ve chilled, drain them well. Now, thread them onto your wooden skewers, alternating the colors in a pattern – typically pink, white, green – to create the iconic Hanami Dango look.
Conclusion:
We’ve reached the sweet finnon-alcoholic ale of our Hanami Dango journey! Crafting these delightful, colorful rice flour dumplings is a wonderfully rewarding experience, bringin extractg a taste of spring celebration right into your kitchen. The combination of chewy texture and subtle sweetness makes Hanami Dango a perfect treat for any occasion, especially during cherry blossom season. Don’t be intimidated by the process; it’s quite straightforward and the results are truly worth it!
For serving suggestions, Hanami Dango is traditionally enjoyed as a snack or dessert. They are beautiful on their own, arranged artfully on a plate. You can also serve them alongside green tea for a classic Japanese experience. For variations, feel free to experiment with natural food colorings like matcha powder for green, beet juice for pink, and butterfly pea flower tea for blue. If you’re feeling adventurous, you could even try incorporating a hint of citrus zest into the dough.
The most important ingredient, however, is your enthusiasm! So, gather your friends and family, embrace the joy of creation, and whip up some delicious Hanami Dango. I encourage you to try this recipe and share the delightful results with loved ones. Happy dumpling making!
Frequently Asked Questions:
Q1: Can I make Hanami Dango ahead of time?
Yes, you can make Hanami Dango a day in advance. Store them in an airtight container at room temperature. Avoid refrigerating them, as this can make the texture tougher. They are best enjoyed within a day or two of making.
Q2: What kind of rice flour should I use for Hanami Dango?
For authentic Hanami Dango, it’s best to use shiratamako or mochigomeko (glutinous rice flour). These flours create the characteristic chewy and soft texture. Regular rice flour will not yield the same result.
Hanami Dango Recipe – Delicious Japanese Sweet Skewers
A delightful recipe for making traditional Japanese Hanami Dango, featuring soft, chewy rice flour balls in vibrant pink, white, and green colors, perfect for spring viewing.
Ingredients
-
1 1/3 cups Joshinko rice flour (non-glutinous)
-
1 1/2 cups Shiratamako sweet glutinous rice flour
-
3/4 cup powdered sugar (optional, for added sweetness)
-
1 1/3 cups hot water
-
1 teaspoon matcha powder
-
1 teaspoon water (for mixing with matcha)
-
1 drop pink food coloring
-
Wooden skewers
Instructions
-
Step 1
In a large bowl, combine the Joshinko rice flour, Shiratamako sweet glutinous rice flour, and powdered sugar (if using). Whisk thoroughly until evenly distributed. -
Step 2
Gradually add the hot water to the dry ingredients while stirring. Continue until a shaggy dough forms, then knead on a lightly floured surface for 5-7 minutes until smooth and elastic. Adjust with a little more hot water or Joshinko flour if needed. -
Step 3
Divide the dough into three equal portions. Leave one portion plain (white). For the green portion, mix 1 tsp matcha powder with 1 tsp water to form a paste, then knead it into one dough portion until uniform. For the pink portion, knead 1 drop of pink food coloring into the remaining dough until evenly colored. -
Step 4
Roll each colored dough portion into small, smooth balls, about 1 inch in diameter. Aim for consistent size for even cooking. You should have about 12-15 balls in total. -
Step 5
Boil the dango balls in medium-high heat water. They are ready when they float to the surface, about 3-5 minutes after floating. Remove with a slotted spoon and immediately transfer to an ice bath for 1-2 minutes. -
Step 6
Drain the chilled dango well. Thread them onto wooden skewers, alternating colors (typically pink, white, green) to create the iconic Hanami Dango pattern.
Important Information
Nutrition Facts (Per Serving)
It is important to consider this information as approximate and not to use it as definitive health advice.
Allergy Information
Please check ingredients for potential allergens and consult a health professional if in doubt.