Easy Biscoff Truffles – Deliciously Creamy Treats
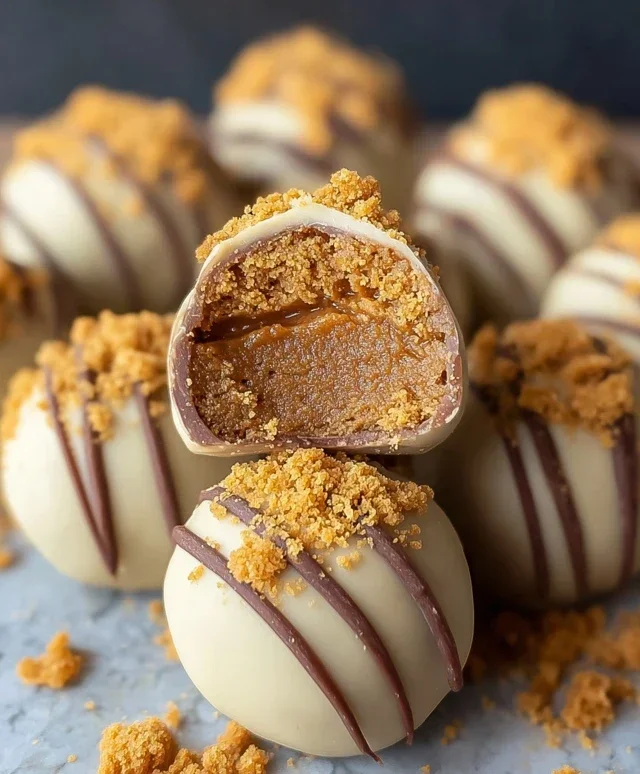
Biscoff truffles are an absolute revelation, a tiny bite of pure bliss that has captured the hearts (and taste buds!) of dessert lovers everywhere. If you’ve ever fallen under the spell of that distinctively spiced, caramelized Lotus Biscoff cookie, then prepare for your world to be rocked. These simple yet elegant Biscoff truffles take that beloved flavor and elevate it into something truly magical. They’re the perfect answer to a sweet craving, a delightful addition to any party platter, or simply a way to treat yourself after a long day. What makes them so special? It’s the incredible alchemy of crushed Biscoff cookies, creamy binders, and that unmistakable cinnamon-sugar warmth that melts in your mouth. I’m so excited to share this easy recipe with you!
Dive into Decadence
Your New Favorite Sweet Treat
Biscoff Truffles: Your New Favorite Sweet Treat
Are you ready to embark on a flavor journey that’s both ridiculously easy and incredibly satisfying? Prepare yourself for Biscoff Truffles, a decadent delight that captures the warm, spiced essence of everyone’s favorite Lotus Biscoff cookies. These little bites of heaven are perfect for gifting, sharing at parties, or simply indulgin extractg in a moment of pure bliss. Forget complicated candy-making; these truffles are surprisingly simple to whip up, requiring minimal effort for maximum impact. The unique combination of creamy Biscoff spread, rich cream cheese, and crunchy cookie crum extractbs creates a texture and flavor explosion that’s truly unforgettable. Let’s dive in and make some magic!
Ingredients:
Getting Started: The Biscoff Truffle Base
The foundation of our delicious Biscoff Truffles lies in creating a rich, flavorful, and perfectly textured filling. This is where the magic truly begin extracts, transforming simple ingredients into a luxurious treat.
1. Creaming the Biscoff Base: In a medium-sized mixing bowl, combine the 1 cup of Biscoff cookie butter and the 1/3 cup of softened cream cheese. It’s crucial that your cream cheese is softened to room temperature. This will ensure a smooth and lump-free mixture. You can leave it on the counter for about an hour or gently microwave it in short bursts (5-10 seconds at a time) if you’re in a hurry, being careful not to melt it. Use a spatula or a hand mixer on low speed to thoroughly blend these two ingredients together until they are completely smooth and well incorporated. You want a creamy, homogenous mixture that smells absolutely divine. This step is the bedrock of our truffle’s texture and flavor, so take your time to get it just right.
2. Adding the Cookie Crunch: Now it’s time to introduce the delightful texture of Biscoff cookie crum extractbs to our creamy base. Add the 1 cup of finely crushed Biscoff cookies to the Biscoff and cream cheese mixture. You can achieve these crum extractbs by pulsing whole Biscoff cookies in a food processor until they form fine pieces, or by placing them in a zip-top bag and crushing them with a rolling pin. Gently fold the cookie crum extractbs into the wet mixture using your spatula. We want to distribute them evenly without overmixing, which could make the filling too dense. This step is what gives our truffles that signature Biscoff cookie crunch and intensifies the overall cookie flavor. The mixture will become thicker and more dough-like at this point, which is exactly what we’re aiming for.
3. Chilling the Filling for Shaping: Once your Biscoff and cookie crum extractb mixture is perfectly combined, it’s time to let it firm up. Cover the bowl tightly with plastic wrap and refrigerate it for at least 1 hour, or until the mixture is firm enough to roll into small balls. Chilling is a critical step. It allows the fats in the Biscoff spread and cream cheese to solidify, making the mixture much easier to handle and preventing it from becoming too sticky. If you try to roll it before chilling, you’ll end up with a messy, unmanageable dough. Patience here will pay off in beautifully shaped truffles.
Rolling and Coating the Truffles
With our chilled Biscoff base ready, we’ll now shape them into perfect little spheres and prepare them for their delicious coating.
4. Forming the Truffles: Once the Biscoff mixture is firm, scoop out portions of the mixture using a small cookie scoop or a tablespoon. Roll each portion between your palms to form smooth, bite-sized balls, about 1 inch in diameter. If the mixture becomes too soft while you’re rolling, simply pop it back into the refrigerator for a few minutes to firm up again. Place the rolled truffle balls onto a baking sheet lined with parchment paper. Make sure they aren’t touching each other to prevent them from sticking. Aim for consistency in size so they all coat evenly.
5. Melting and Coating with Chocolate: Now for the final, glamorous step: coating our truffles in luscious chocolate! You have two excellent options here: almond bark or white chocolate candy melts. Both melt beautifully and set up nicely, providing a smooth, protective shell for our Biscoff filling. Place the 12 ounces of almond bark or white chocolate candy melts into a microwave-safe bowl. Microwave in 30-second intervals, stirring well after each interval, until the chocolate is completely smooth and melted. Be careful not to overheat the chocolate, as it can seize up and become unusable. Alternatively, you can melt the chocolate using a double boiler. Once melted, dip each truffle ball into the melted chocolate using a fork or a dipping tool. Allow any excess chocolate to drip back into the bowl, then return the coated truffle to the parchment-lined baking sheet. Work quickly, as the chocolate will start to set.
Finishing Touches: Drizzle and Delight
These truffles are already delicious, but a little extra flourish can take them to the next level.
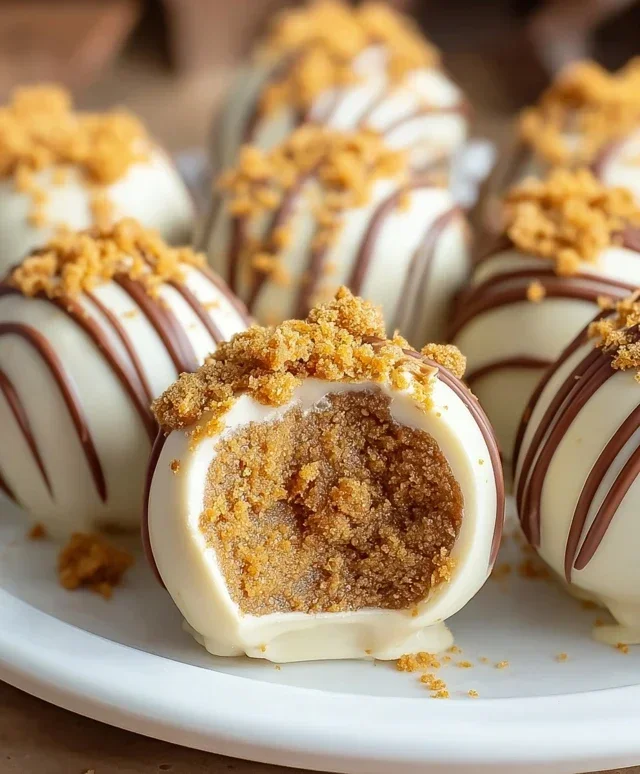
6. The Optional Biscoff Drizzle: For an extra touch of Biscoff perfection and visual appeal, we can add a delightful drizzle. Take the remaining 1/4 cup of Biscoff cookie butter. If it’s very thick, you can gently warm it for a few seconds in the microwave (just until pourable, not hot) or stir in a tiny splash of neutral oil (like vegetable or canola) to thin it out. Place the warmed Biscoff cookie butter into a piping bag with a small, fine tip, or a zip-top bag with a corner snipped off. Once the chocolate coating on the truffles has started to set (they should still be slightly soft but not wet), drizzle the Biscoff cookie butter back and forth over the coated truffles. This adds another layer of flavor and a beautiful, tempting finish.
Let your Biscoff Truffles set completely at room temperature or in the refrigerator for about 15-30 minutes until the chocolate coating is firm. Enjoy these irresistible treats as they are, or present them in a beautiful box for a truly memorable homemade gift. They are best stored in an airtight container in the refrigerator, but allow them to come to room temperature for a few minutes before serving for the best texture and flavor. Happy truffle making!
Conclusion:
I hope you’ve enjoyed diving into the world of Biscoff Truffles with me! This recipe is truly a gem because it’s incredibly easy to make, requires minimal ingredients, and delivers an explosion of delicious, spiced cookie flavor with every bite. The creamy, melt-in-your-mouth texture combined with that signature Biscoff caramelization is simply irresistible. These little delights are perfect for any occasion, from a spontaneous sweet treat to a sophisticated addition to a dessert platter. Imagin extracte them nestled alongside fresh berries, a scoop of vanilla ice cream, or even dusted with a little extra cinnamon for a festive touch. Don’t be afraid to get creative with variations – you could dip them in dark chocolate for a richer contrast, sprinkle them with chopped nuts like pistachios or hazelnuts, or even swirl in a touch of cream cheese for an extra decadent filling. I truly encourage you to try making these Biscoff Truffles; they’re guaranteed to impress and satisfy your sweet cravings!
Frequently Asked Questions:
Can I make these Biscoff Truffles ahead of time?
Absolutely! These truffles are fantastic for making in advance. Once rolled and coated (if applicable), store them in an airtight container in the refrigerator for up to a week. They might even taste better the next day as the flavors meld together!
What if I can’t find Biscoff cookies?
While Biscoff cookies offer that unique speculoos flavor, you can achieve a similar effect with other spiced shortbread or gin extractgerbread cookies. You might need to adjust the amount of added sweetener slightly depending on the sweetness of your chosen alternative.
How should I store leftover Biscoff Truffles?
For the best texture and freshness, store any leftover Biscoff Truffles in an airtight container in the refrigerator. This will help them maintain their shape and prevent them from becoming too soft. Enjoy them chilled!
Biscoff Truffles
Decadent no-bake truffles made with creamy Biscoff cookie butter, cream cheese, and crushed Biscoff cookies, coated in smooth almond bark.
Ingredients
-
1 cup Biscoff cookie butter
-
1/3 cup cream cheese, softened
-
1 cup Biscoff cookie crumbs
-
12 ounces almond bark or white chocolate candy melts
-
1/4 cup Biscoff cookie butter
Instructions
-
Step 1
In a medium bowl, combine the 1 cup Biscoff cookie butter and softened cream cheese. Mix until smooth and well combined. -
Step 2
Stir in the Biscoff cookie crumbs until fully incorporated into the mixture. -
Step 3
Roll the mixture into 1-inch balls and place them on a baking sheet lined with parchment paper. Freeze for at least 30 minutes to firm up. -
Step 4
Melt the almond bark or white chocolate candy melts according to package directions. -
Step 5
Dip each frozen truffle into the melted chocolate, ensuring it’s fully coated. Let excess chocolate drip off. -
Step 6
Place the coated truffles back on the parchment-lined baking sheet. Drizzle the remaining 1/4 cup melted Biscoff cookie butter over the truffles, if desired, for extra flavor and decoration. -
Step 7
Allow the chocolate to set completely before serving.
Important Information
Nutrition Facts (Per Serving)
It is important to consider this information as approximate and not to use it as definitive health advice.
Allergy Information
Please check ingredients for potential allergens and consult a health professional if in doubt.