Cheesy Garlic Butter Corn on the Cob Recipe
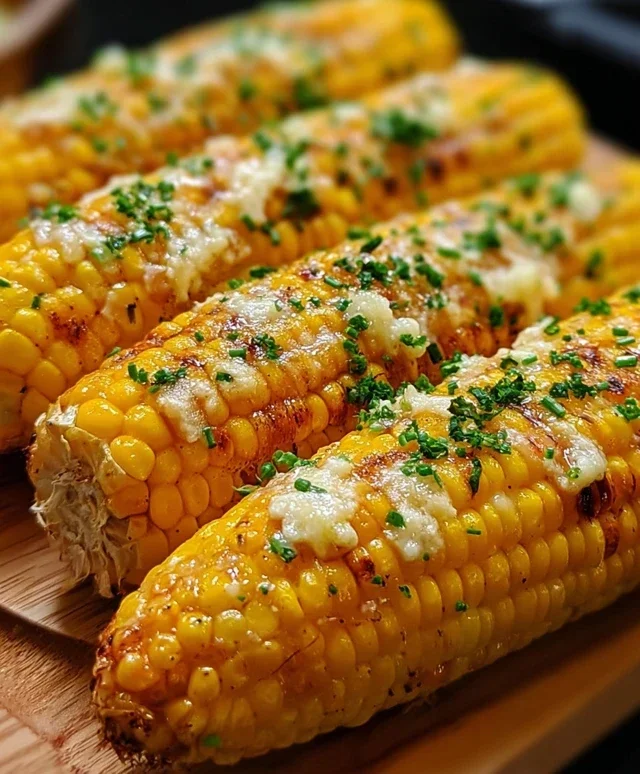
Cheesy Garlic Butter Corn on the Cob is the absolute ultimate summer side dish, and I’m so excited to share my favorite way to make it with you! Picture this: plump kernels bursting with sweet corn flavor, all coated in a decadent, garlicky butter sauce and then topped with a generous sprinkle of melted cheese. It’s pure, unadulterated joy on a stick! We all love corn on the cob, but elevating it with these savory, rich additions takes it to a whole new level. This isn’t just corn; it’s an experience. The combination of the creamy, salty cheese, the pungent kick of garlic, and the sweet crunch of perfectly cooked corn creates a symphony of flavors that’s simply irresistible. It’s the perfect accompaniment to any barbecue, picnic, or even just a cozy weeknight meal. Get ready to impress everyone with this unbelievably delicious Cheesy Garlic Butter Corn on the Cob!
Cheesy Garlic Butter Corn on the Cob
There’s something undeniably special about corn on the cob. It’s the quintessential taste of summer, a simple pleasure that brings smiles to faces of all ages. But what if I told you we could elevate this humble classic into something truly extraordinary? Prepare yourself for a flavor explosion with my Cheesy Garlic Butter Corn on the Cob. This recipe takes the sweet, juicy kernels we all love and coats them in a luscious, savory mixture of garlic butter and salty Parmesan cheese, with a hint of bright lemon zest if you’re feeling fancy. It’s incredibly easy to make, perfect for grilling or baking, and guaranteed to become a new favorite side dish. Get ready to impress your taste buds!
Ingredients:
Cooking Instructions
This recipe is wonderfully versatile, meaning you can cook your corn on the cob in the oven or on the grill. Both methods yield delicious results, and the cheesy garlic butter mixture is the star of the show, no matter how you cook it. Let’s get started!
Preparation is Key
The first step to achieving corn on the cob perfection is to get our flavor-packed garlic butter mixture ready. In a small bowl, combine the softened unsalted butter. Ensure your butter is at room temperature, not melted, as this will help it spread more easily and evenly over the corn. To this, add the finely minced garlic cloves. Mincing the garlic ensures that its potent flavor is distributed throughout the butter, infusing every bite with aromatic goodness. Next, stir in the chopped fresh parsley. Fresh parsley adds a vibrant green color and a subtle herbaceous note that beautifully complements the richness of the butter and garlic. Season this glorious mixture with salt and freshly ground black pepper. These pantry staples are essential for enhancing all the other flavors. Finally, if you’re using it, stir in the lemon zest. The zest from a fresh lemon provides a wonderful brightness that cuts through the richness of the butter and cheese, adding a delightful tang. Mix everything together until it’s well combined and forms a creamy, aromatic paste.
Coating the Corn
Now for the fun part: coating our beautiful corn. Take your husked ears of corn and place them on a clean surface. Using a butter knife or a small spatula, generously spread the garlic butter mixture all over the corn. Don’t be shy! Make sure to get an even layer all the way around, from the base to the tip. The softened butter will help the mixture adhere nicely to the kernels. Once the corn is thoroughly coated in the garlic butter, it’s time to add the cheesy element. Sprinkle the grated Parmesan cheese liberally over the buttered corn, pressing it gently so it sticks. The Parmesan cheese will melt and become wonderfully crispy and golden during cooking, adding a delightful salty, nutty dimension that pairs perfectly with the garlic butter.
Cooking Methods: Oven Roasting for Crispy Perfection
If you prefer to roast your corn in the oven, preheat your oven to 400°F (200°C). Once your corn is coated with the garlic butter and Parmesan, you have a couple of options for wrapping it. You can wrap each ear individually in aluminum foil. This method helps to steam the corn within its buttery coating, ensuring it stays incredibly moist and tender. Place the foil-wrapped corn directly on a baking sheet. Another option, if you prefer a slightly crispier finish on the cheese, is to bake the corn directly on the baking sheet without foil for the last 5-10 minutes of cooking. Roast for about 20-25 minutes, or until the corn is tender and the Parmesan cheese is melted and begin extractning to turn golden brown. Keep an eye on it to prevent burning.
Cooking Methods: Grilling for Smoky Delight
For those who love the smoky flavor of grilled corn, preheat your grill to medium-high heat. Again, you can wrap your buttered and cheesed corn in aluminum foil to keep it moist, or you can grill it directly. If grilling directly, place the corn on the grill grates. Grill for about 15-20 minutes, turning occasionally, until the kernels are tender and slightly charred in places, and the cheese is melted and bubbly. Wrapping in foil will result in a more steamed, less charred corn, while direct grilling will give you those desirable char marks and a more intense smoky flavor. Whichever method you choose, the result is a flavorful, irresistible corn on the cob that’s a guaranteed crowd-pleaser.
The Grand Finnon-alcoholic ale: Serving Your Masterpiece
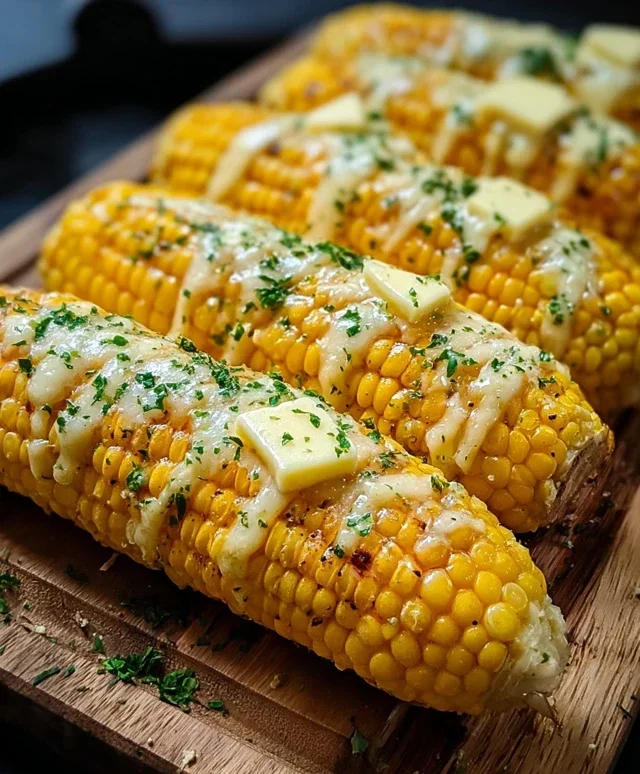
Once your Cheesy Garlic Butter Corn on the Cob is cooked to perfection, remove it from the oven or grill. Be cautious, as it will be hot! If you wrapped it in foil, carefully unwrap it to reveal the glistening, cheesy goodness. You can serve it immediately as is, or, for an extra touch of freshness, you can sprinkle a little more fresh parsley or even a squeeze of fresh lemon juice over the top right before serving. The aroma alone will have everyone gathering around the table. This corn is fantastic on its own as a vibrant side dish for barbecues, potlucks, or even just a weeknight dinner. It pairs wonderfully with grilled meats, poultry, fish, or a hearty salad. Enjoy every single buttery, cheesy, garlicky bite!
Conclusion:
So there you have it – a recipe for Cheesy Garlic Butter Corn on the Cob that is guaranteed to be a crowd-pleaser! This dish is fantastic because it takes a summer staple and elevates it with a rich, savory, and utterly irresistible topping. The combination of sweet corn, pungent garlic, creamy butter, and melted cheese is simply divine. It’s incredibly easy to make, perfect for grilling, boiling, or even baking, making it versatile for any occasion. I truly encourage you to give this Cheesy Garlic Butter Corn on the Cob a try; you won’t be disappointed!
This delicious corn is fantastic served as a side dish alongside grilled chicken, burgers, or steak. It also makes a wonderful addition to any barbecue spread or potluck. For variations, feel free to add a pinch of smoked paprika for a subtle smoky flavor, a sprinkle of chopped fresh chives or parsley for added color and freshness, or even a dash of cayenne pepper if you like a little heat. The possibilities are endless!
Frequently Asked Questions:
Can I make this recipe ahead of time?
While the corn itself is best cooked fresh, you can prepare the cheesy garlic butter mixture ahead of time and store it in the refrigerator. Simply bring it to room temperature or gently warm it before spreading it over your cooked corn.
What’s the best way to cook the corn?
All methods work beautifully! Grilling imparts a lovely smoky char, boiling ensures tender kernels, and baking creates a beautifully melted cheese topping. Choose whichever method best suits your cooking setup and preference.
Cheesy Garlic Butter Corn on the Cob
A delicious and easy recipe for corn on the cob loaded with cheesy garlic butter and fresh parsley.
Ingredients
-
4 ears fresh corn, husked
-
¼ cup (½ stick) unsalted butter, softened
-
2 garlic cloves, minced
-
1 tbsp chopped fresh parsley
-
½ tsp salt
-
¼ tsp black pepper
-
½ cup grated Parmesan cheese
-
1 tsp lemon zest (optional)
Instructions
-
Step 1
Preheat your grill or oven to 400°F (200°C). -
Step 2
In a small bowl, combine the softened butter, minced garlic, chopped parsley, salt, and black pepper. Mix well. -
Step 3
Spread the garlic butter mixture evenly over each ear of corn. -
Step 4
Place the corn directly on the grill grates or on a baking sheet in the oven. If grilling, you may want to place a foil pan underneath to catch any drips. -
Step 5
Grill or bake for 15-20 minutes, turning occasionally, until the corn is tender and slightly charred. -
Step 6
Remove the corn from the heat. Sprinkle generously with grated Parmesan cheese and optional lemon zest. Serve immediately.
Important Information
Nutrition Facts (Per Serving)
It is important to consider this information as approximate and not to use it as definitive health advice.
Allergy Information
Please check ingredients for potential allergens and consult a health professional if in doubt.