Easy Homemade Fruit Leather – Sweet Snack Recipe
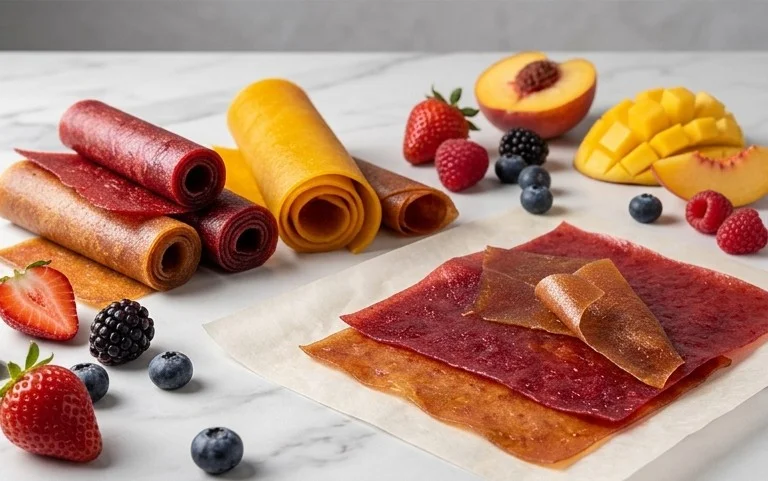
Homemade Fruit Leather Recipe is one of those culinary creations that instantly transports you back to carefree childhood summers. Remember those vibrant, chewy strips that tasted like pure sunshine? That’s the magic we’re capturing today! There’s something incredibly satisfying about transforming simple fruit into a concentrated burst of flavor and a delightful, portable snack. What makes this homemade fruit leather recipe so special is its incredible versatility. You can use virtually any fruit you have on hand, from classic strawberries and apples to exotic mangoes and passion fruit. It’s a fantastic way to use up a surplus of fresh produce, and the process itself is wonderfully therapeutic. Forget store-bought alternatives filled with artificial flavors and excessive sugar; our homemade fruit leather recipe delivers pure, unadulterated fruit goodness that everyone will adore.
Homemade Fruit Leather Recipe
There’s something incredibly satisfying about making your own fruit leather. It’s a delicious and healthy snack that’s perfect for lunchboxes, picnics, or just a sweet treat any time of day. Plus, it’s surprisingly simple to make, requiring just a few basic ingredients and a little bit of patience. Forget those store-bought versions with artificial colors and flavors; making fruit leather at home allows you to control exactly what goes into it, ensuring a pure, fruity, and wholesome snack. The best part? You can customize it with your favorite fruits, creating endless flavor combinations.
This recipe is a fantastic starting point. It’s straightforward, uses minimal ingredients, and yields a wonderfully chewy and flavorful fruit leather. It’s the perfect way to preserve the taste of fresh fruit, especially when it’s in season and abundant. My personal favorite is using a mix of berries, but apples, pears, and even tropical fruits like mango can be transformed into delightful fruit leather. The slight tartness from the lemon juice really brightens the flavors and helps preserve the vibrant color of the fruit, while the sugar balances out any natural tartness without making it overly sweet.
The process itself is quite rewarding. You’ll witness the fruit transform from chunky pieces into a smooth puree, and then, through the gentle heat of the oven, watch it dehydrate into that signature chewy, leathery texture. It’s a bit like magic, but with a delicious edible outcome!
Ingredients:
Cooking Instructions
The beauty of homemade fruit leather lies in its simplicity. We’re essentially pureeing fruit, sweetening it slightly, and then slowly dehydrating it until it reaches the perfect chewy consistency. Let’s get started!
1. Prepare the Fruit and Puree: Begin extract by washing your chosen fruit thoroughly. If you’re using larger fruits like apples or peaches, make sure to chop them into small, manageable pieces. Remove any pits, cores, or tough skins that you don’t want in your final fruit leather. For softer fruits like berries, a quick rinse is usually all that’s needed. Once your fruit is prepped, add it to a blender or food processor. You want to process the fruit until it’s as smooth as possible. There should be no large chunks remaining. If your fruit is particularly fibrous (like raspberries), you might want to strain the puree through a fine-mesh sieve at this stage to remove seeds and create an even smoother texture. Don’t skip this if you prefer a seedless leather; it makes a significant difference in the final product.
2. Sweeten and Flavor: Once you have a smooth fruit puree, it’s time to add the other key ingredients. Measure out your 3 tablespoons of white sugar and add it directly to the blender or food processor with the fruit puree. Next, take half of a whole lemon and squeeze its juice into the mixture. The lemon juice plays a dual role: it adds a subtle brightness and tang that complements the sweetness of the fruit and sugar, and it also acts as a natural preservative, helping to keep your fruit leather fresh for longer. Blend everything together for another minute or two until the sugar is completely dissolved and the mixture is uniform in color and consistency. Taste a tiny bit of the mixture at this point – this is your chance to adjust the sweetness if needed. If your fruit was very tart, you might want to add another teaspoon or two of sugar. Conversely, if it’s already quite sweet, you can reduce it slightly.
3. Prepare for Baking: Now comes the part where we prepare to dehydrate our fruit mixture. Preheat your oven to its lowest possible temperature. This is typically around 170°F (75°C) to 200°F (95°C). It’s crucial to use a low temperature to gently dry out the fruit without cooking it or burning it. Line a baking sheet with parchment paper or a silicone baking mat. Make sure the lining covers the entire surface of the baking sheet. Pour your fruit puree onto the prepared baking sheet. Spread the puree out as evenly as possible to a thickness of about ¼ inch. Using an offset spatula or the back of a spoon helps to achieve a smooth and uniform layer. A consistent thickness is key for even drying, ensuring that some parts don’t dry out too quickly while others remain too moist.
4. The Dehydration Process: Carefully place the baking sheet into your preheated oven. Leave the oven door slightly ajar – just a crack is enough. This allows moisture to escape from the oven, aiding in the dehydration process. You can prop the door open with a wooden spoon or a heatproof utensil. The fruit leather will need to dehydrate for several hours. Check on it periodically, usually every hour or so. The total time will vary depending on your oven, the thickness of your puree, and the moisture content of your fruit. It can take anywhere from 4 to 10 hours. You’re looking for the fruit leather to be no longer sticky to the touch and to peel away cleanly from the parchment paper. It should feel leathery and pliable, not brittle or gooey.
5. Cooling and Storing: Once the fruit leather has reached the desired consistency – firm, pliable, and no longer tacky – carefully remove the baking sheet from the oven. Let it cool completely on the baking sheet. As it cools, it will firm up slightly more. Once completely cool, you can gently peel the fruit leather off the parchment paper. At this point, you can cut it into strips, squares, or roll it up. To store, wrap individual pieces tightly in plastic wrap or wax paper to prevent them from sticking together and to keep them fresh. Store the fruit leather in an airtight container at room temperature. It should keep well for a couple of weeks. For longer storage, you can also freeze it. This homemade fruit leather is a delightful, guilt-free snack that you’ll be proud to share!
Conclusion:
And there you have it! This homemade fruit leather recipe is a fantastic way to preserve the delicious flavors of your favorite fruits and create a healthy, chewy treat that’s perfect for snacks, lunchboxes, or even a fun dessert. It’s incredibly rewarding to see simple ingredients transform into vibrant, flavorful sheets of fruit goodness. The process is surprisingly easy, making it a great activity to do with kids, and the results are always a crowd-pleaser. Forget store-bought versions laden with artificial ingredients; this homemade fruit leather is pure, unadulterated fruit bliss!
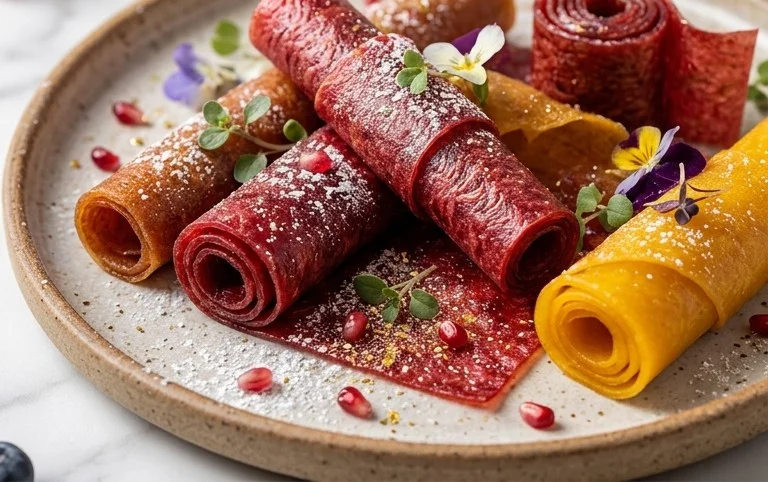
Enjoy your fruit leather plain, or get creative with serving suggestions! It’s delightful on its own, but you can also roll it up into fun shapes, cut it into strips, or even use it as a vibrant topping for yogurt or ice cream. For variations, the possibilities are endless! Feel free to experiment with different fruit combinations – think strawberry-banana, apple-cinnamon, or even a tropical mango-pineapple blend. Adding a touch of spice like gin extractger or cinnamon can also elevate the flavor profile. Don’t be afraid to play around and discover your own signature fruit leather creation. I truly encourage you to give this recipe a try; you won’t be disappointed!
Frequently Asked Questions:
Can I use frozen fruit for this recipe?
Absolutely! Frozen fruit works perfectly for homemade fruit leather. Ensure you thaw it completely and drain any excess liquid before blending, as too much moisture can affect the drying time.
How long does homemade fruit leather last?
When stored properly in an airtight container at room temperature, your homemade fruit leather can last for about 1-2 weeks. For longer storage, you can refrigerate it for up to a month or even freeze it.
What if my fruit leather is too sticky?
If your fruit leather is still a bit sticky after the suggested drying time, you can continue to dry it for longer periods, perhaps turning the temperature down slightly to prevent over-browning. Sometimes, a slightly thicker fruit base or higher humidity can lead to a stickier result. You can also try lightly dusting the back with a tiny bit of cornstarch or fruit powder once it’s cooled to make it easier to handle.
Homemade Fruit Leather
A simple and delicious recipe for making fruit leather at home, using fresh fruit and minimal ingredients.
Ingredients
-
2 cups fruit, chopped
-
3 tbsp white sugar
-
½ whole lemon, just the juice
-
1 tsp vanilla extract
-
Pinch of salt
-
1 tbsp cornstarch (optional, for thickening)
Instructions
-
Step 1
Preheat oven to the lowest possible setting, around 170°F (75°C). Line a baking sheet with parchment paper or a silicone baking mat. -
Step 2
Combine the chopped fruit, white sugar, and lemon juice in a saucepan. Cook over medium heat, stirring occasionally, until the fruit breaks down and becomes soft, about 10-15 minutes. -
Step 3
Remove from heat. For a smoother texture, blend the fruit mixture until pureed using an immersion blender or a regular blender. If using cornstarch, whisk it in now. -
Step 4
Stir in the vanilla extract and pinch of salt. -
Step 5
Pour the fruit puree onto the prepared baking sheet, spreading it evenly into a thin layer (about 1/8 to 1/4 inch thick). -
Step 6
Bake in the preheated oven for 2-3 hours, or until the fruit leather is no longer sticky to the touch and can be easily peeled from the parchment paper. Drying time will vary depending on oven temperature and fruit thickness. -
Step 7
Let the fruit leather cool completely on the baking sheet before cutting into strips or shapes with a knife or pizza cutter.
Important Information
Nutrition Facts (Per Serving)
It is important to consider this information as approximate and not to use it as definitive health advice.
Allergy Information
Please check ingredients for potential allergens and consult a health professional if in doubt.